Reverse engineering an Aermacchi CRTT tank
The tank of a Harley-Davidson Aermacchi CRTT is an iconic masterpiece of design. The classic shape of the long rectangular tank with gracefully radiused edges on many 1960’s race bikes are works of art. We will reverse engineering this tank, along with all the front and rear brackets, filler bung, vent bung, and petcock bung.
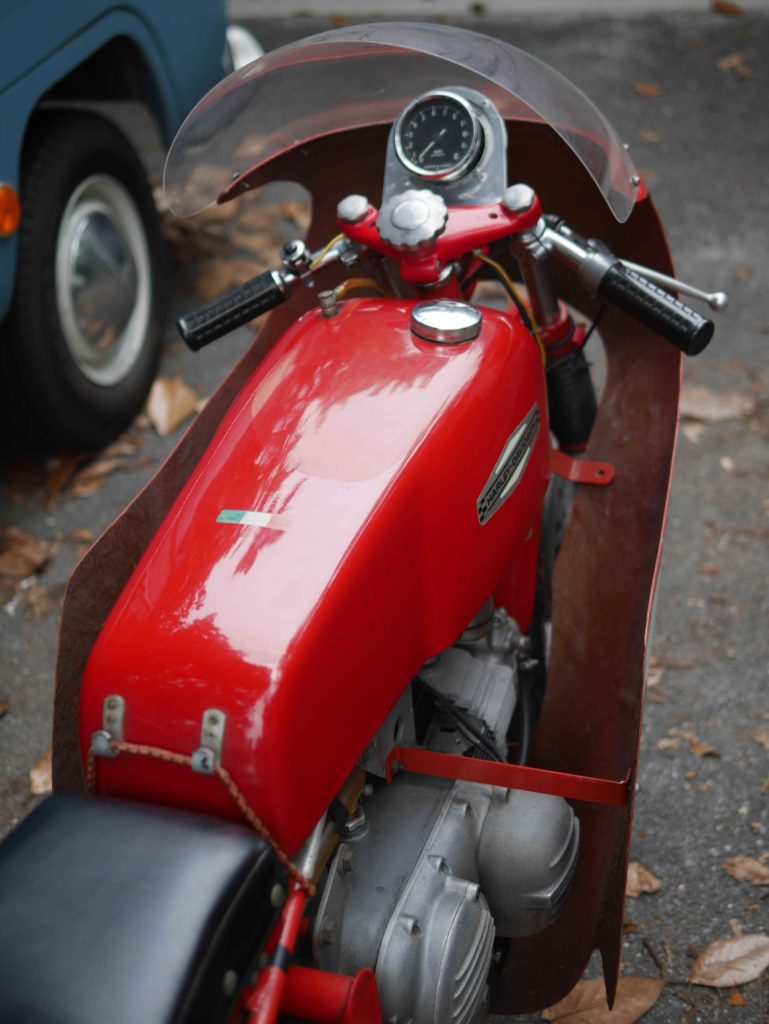
Aermacchi CRTT with lovely rectangular tank
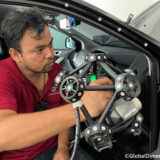
The first step is to scan the tank with a 3D scanner. For this job we used a portable handheld scanner, the Creaform Handyscan. We scanned at 100 micron (4/1000 of an inch). The scanner is capable of 50 (2/1000) micron resolution, but it just takes much longer. Long duration scanning jobs also introduce more error, so we need to choose an accuracy that is good enough for the job. If there were sharp bends and other rapidly changing shapes on this object, we would scan at higher resolution and most likely, with a different scanner in our arsenal. A smooth tank with graceful and large radii can be scanned successfully at much lower resolution, even 1-2 mm would provide great quality results because of the flat sides and gentle radii.
The Creaform Handyscan system is based on round sticker targets (see picture below). The hand-held scanner uses these targets to track the object in 3D space, while the scanners multiple lasers and 2 cameras take pictures and create a 3D structure in the memory of a USB connected notebook. The notebook is running Creaform’s VXelements software package.
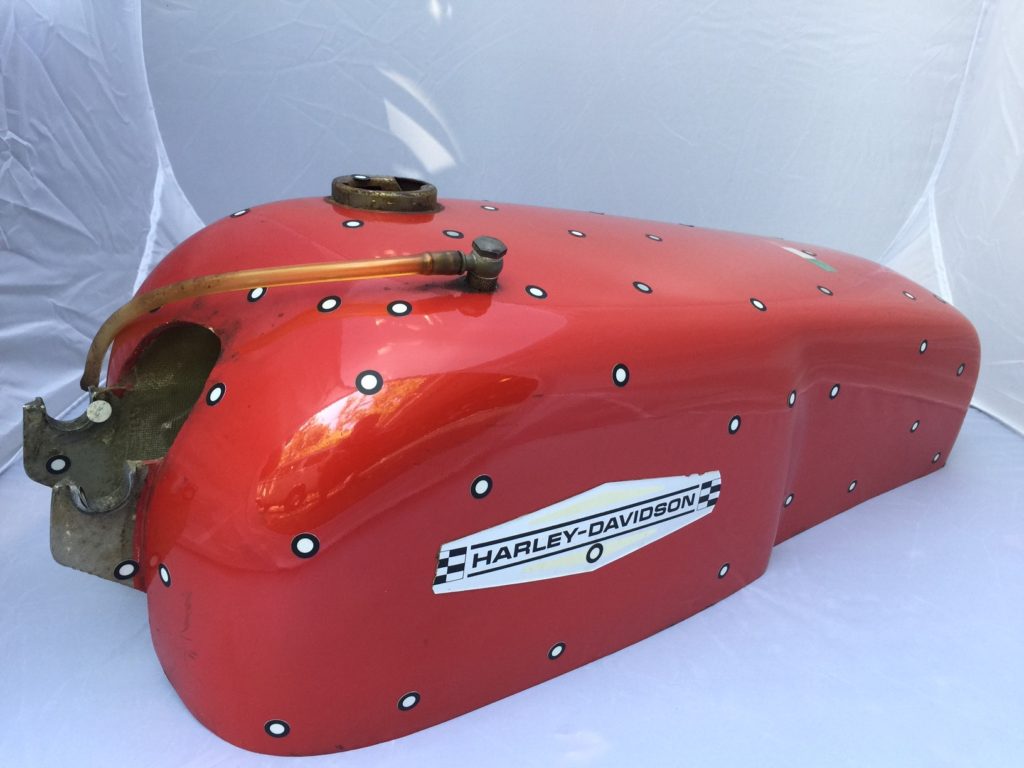
Aermacchi CRTT tank with targets
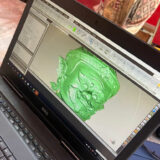
Below is the resultant scan of the tank. Looks nice in blue.
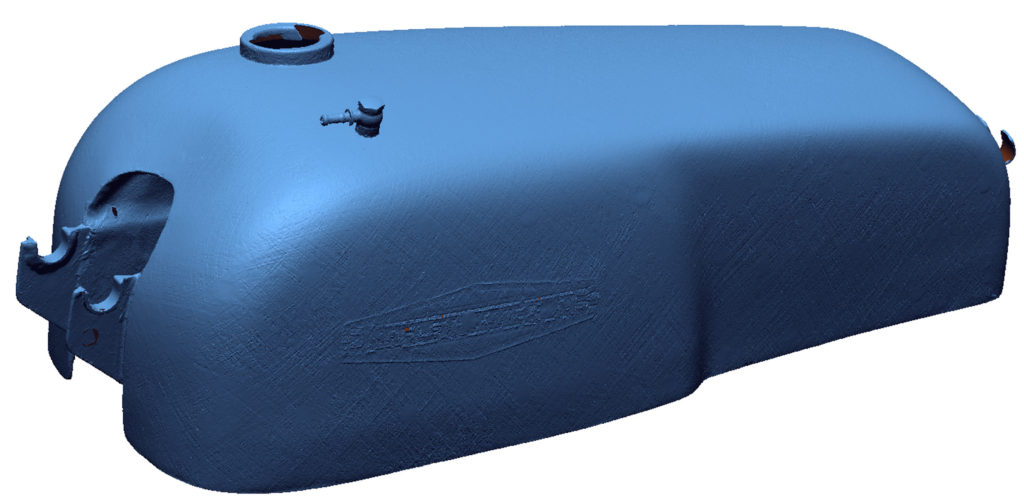
Aermacchi tank scanned data
This tank is extremely light. They made it light by making the fibreglass very thin. You can see the fibreglass weave through the paint. You can see the weave pattern in the photo of the air vent bung, below.
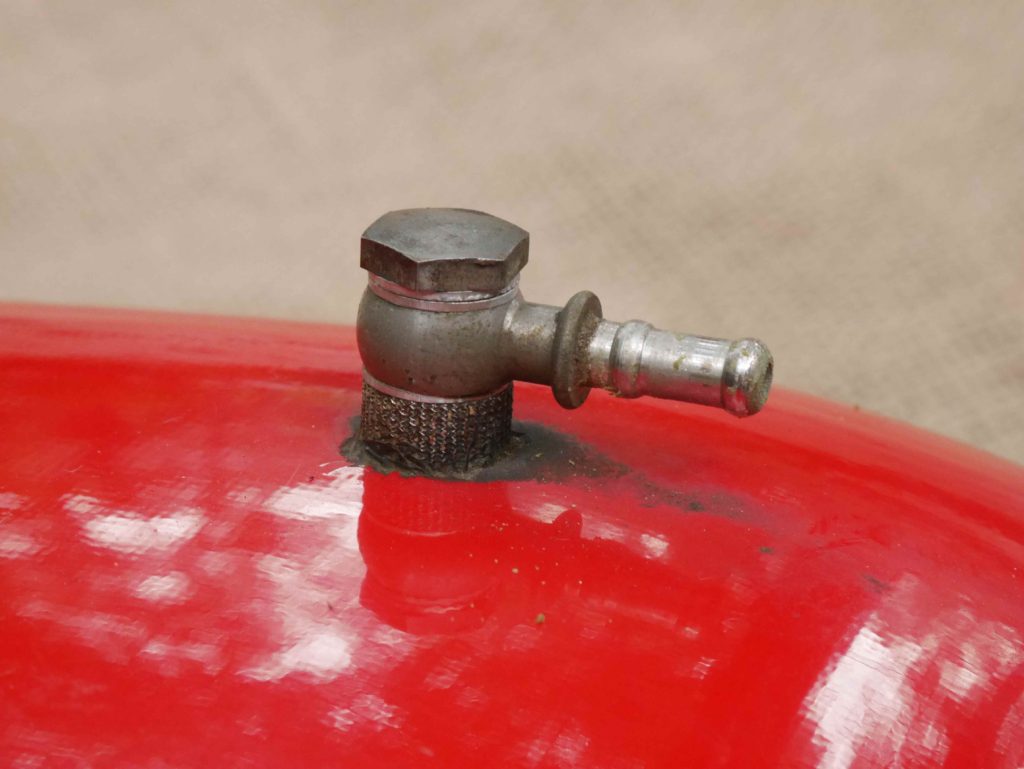
Aermacchi CRTT tank with very thin fibreglass!
Because of this extremely thin fibreglass, the tank is rather flexible. You can easily push on some of the larger flat surfaces and make them move. OK for a race bike, but a street bike may need another layer or two of fibreglass cloth and resin. This thinness of the fibreglass and the relatively low annual volume of production of these handmade tanks results in variances in the surface straightness. We will illustrate how we discover these imperfections in the scan data, and how we apply an averaging smoothing algorithm to get back to what the designer most likely intended.
We used 3DSystems Geomagic ControlX to do a ‘3D compare’. The process for a ‘3D compare’ is we take half the tank and mirror to the other side. This way we can see the differences mapped together. I picked 4 of the most extreme high/low, and put a readable label next to it, see below.
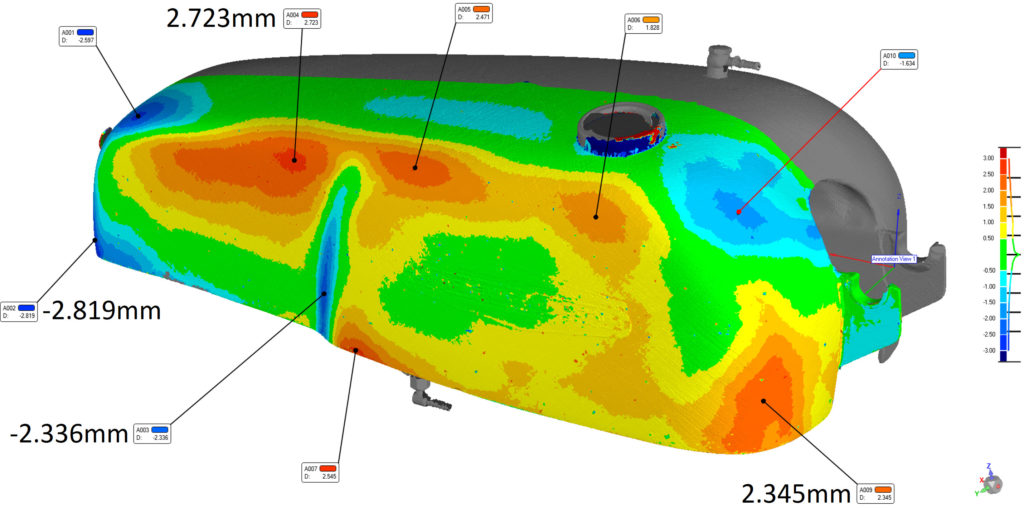
Aermacchi tank 3D compare
You can see the highest points are 2.732mm and 2.345mm higher from one side of the tank to the other mirrored side. Lowest spots are -2.819mm and -2.336mm. Because the tank has a lovely shape, the eye will not be able to detect these high and low spots on either side of the tank. But for us to make a “perfect CAD” we will correct these high/low spots. With a little software magic, we can average the 2 sides of the fuel tank together. You can see the results after averaging both sides data, in the ‘3D compare’ map, below.
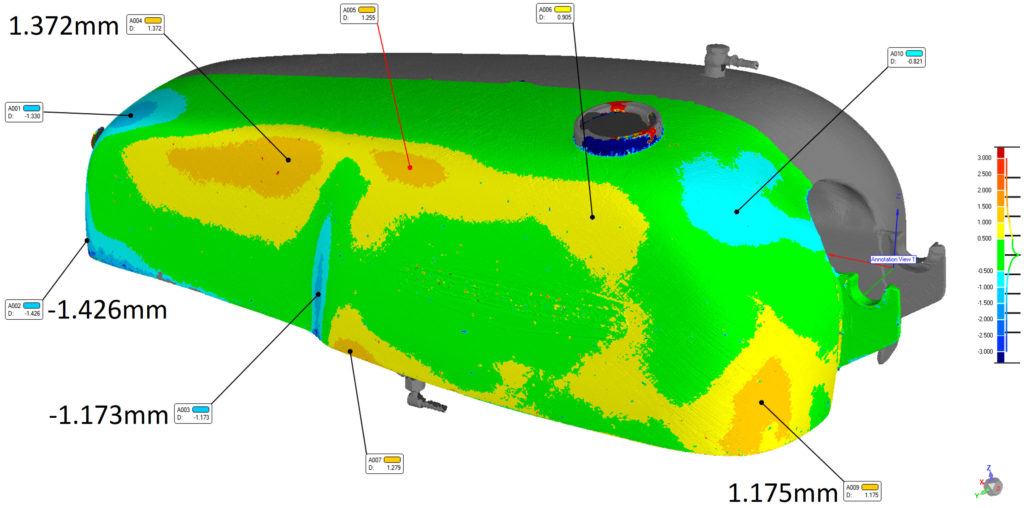
Aermacchi tank 3D compare after averaging
At this stage, we have a good piece of clay to work with (the averaged scan data). The result is new polygon data, below. You will see the tank vent is now on both sides, as this is part of the averaging process. Don’t worry, we are just averaging to get the larger shape exactly the way we want it, we will put the fuel filler bung, air vent, petcock in their perfect positions.
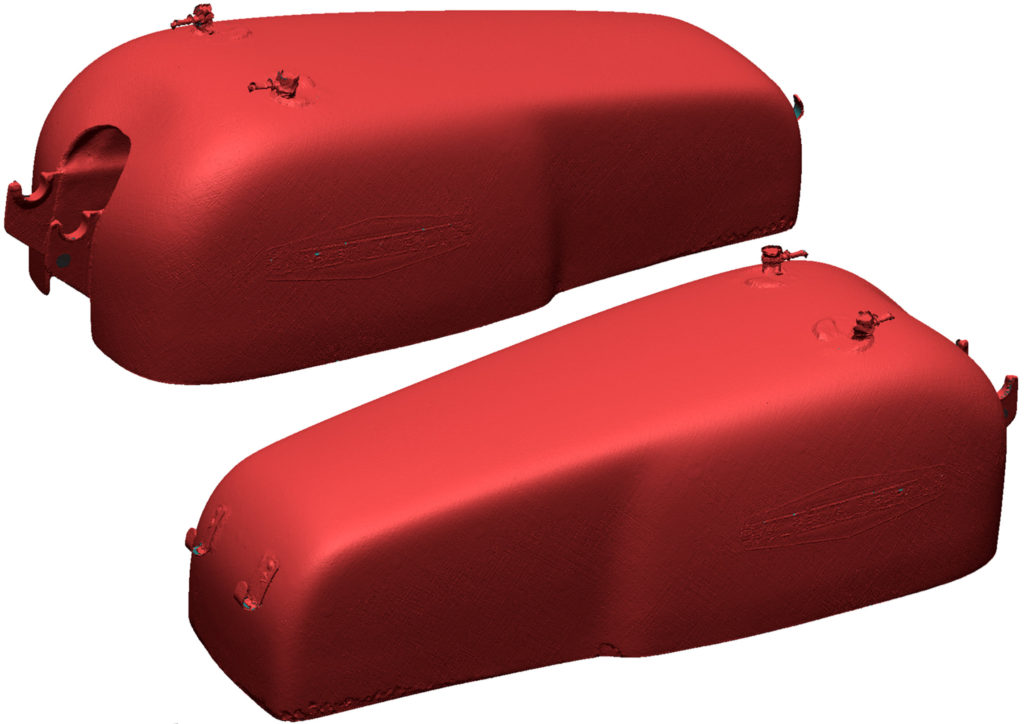
Aermacchi tank data after symmetrical averaging
Next steps are to take this newly ‘averaged’ scan data and make it a perfectly smooth CAD model. The CAD data can be then used to recreate new moulds using CNC tools if desired. The first step is the get the ‘character’ of the object correctly outlined. These are the key pieces of geometry, as you can see in the picture, below.
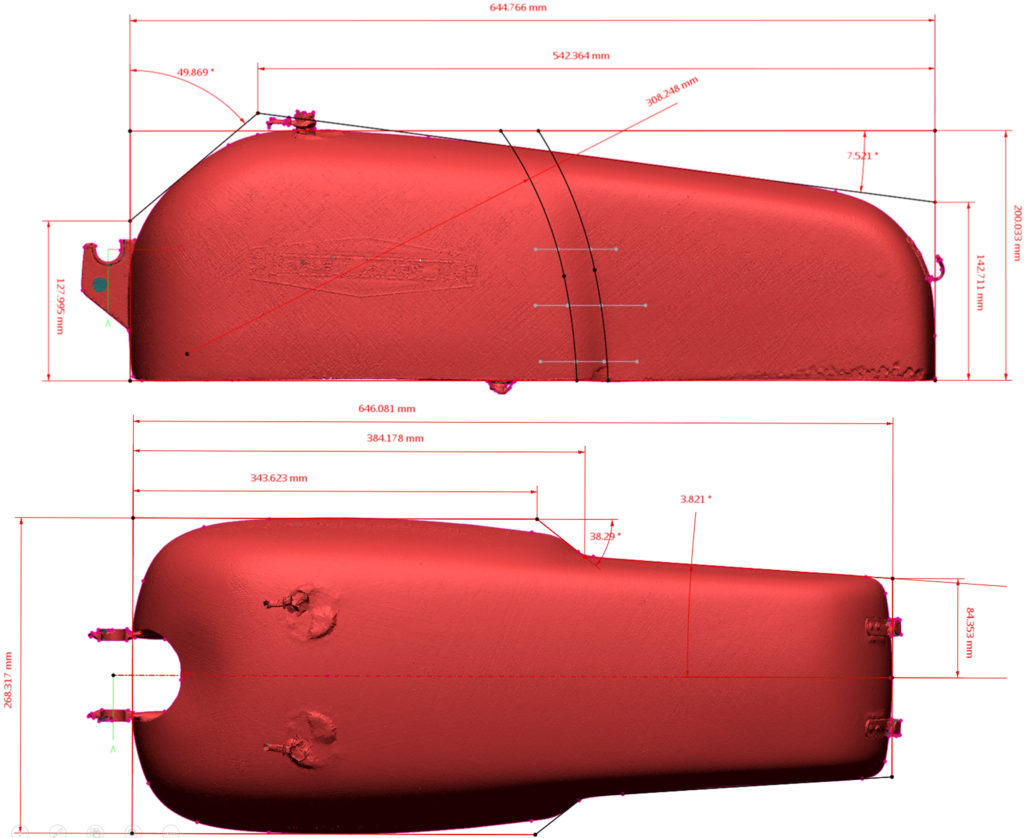
Aermacchi tank with general 2D measurement
After you get the key geometry, you get a boxy shape that is the start of the shaping process.
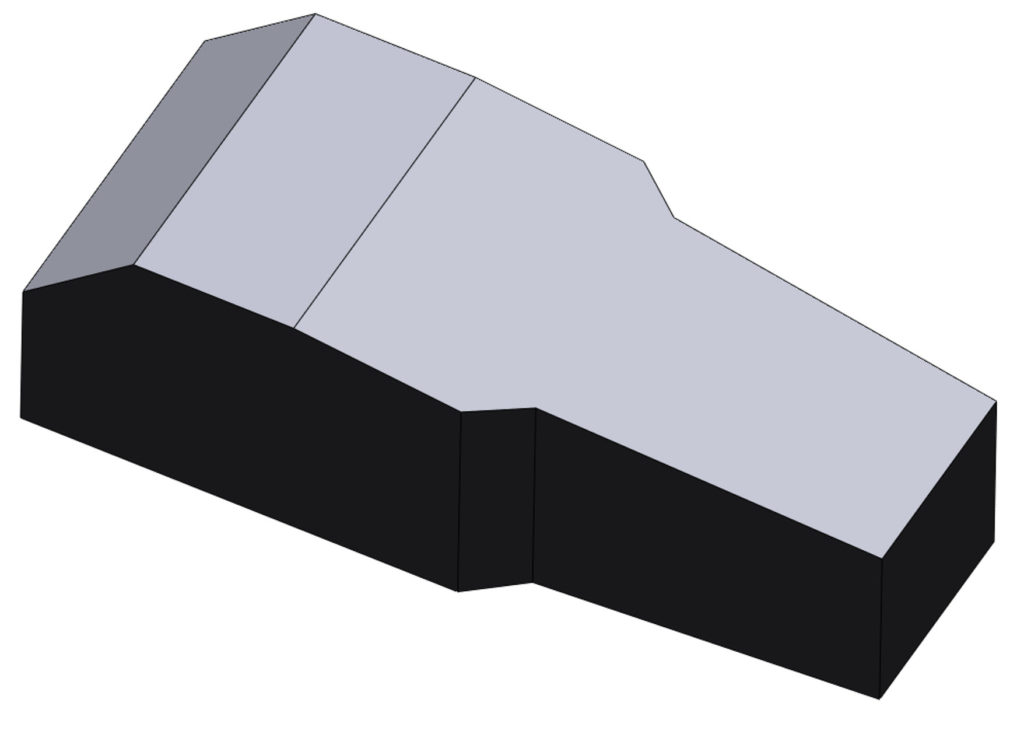
Aermacchi tank with basic design character
We then apply many hours of pushing and pulling surfaces, to get the perfect shape. A CAD software package (like SolidWorks) in the hands of an average engineer can produce a decent surface fairly quickly. It will not be perfect, but decent. We specialise in making perfect ‘Class A’ surfaces that take considerably more expertise and a lot more hours of work. For ‘Class A’ we use software specifically for this purpose, such as 3D System’s Geomagic DesignX. The model below took many hours to get the surface.

Aermacchi tank with wirefame
The model can then be rendered with a simple surface texture.
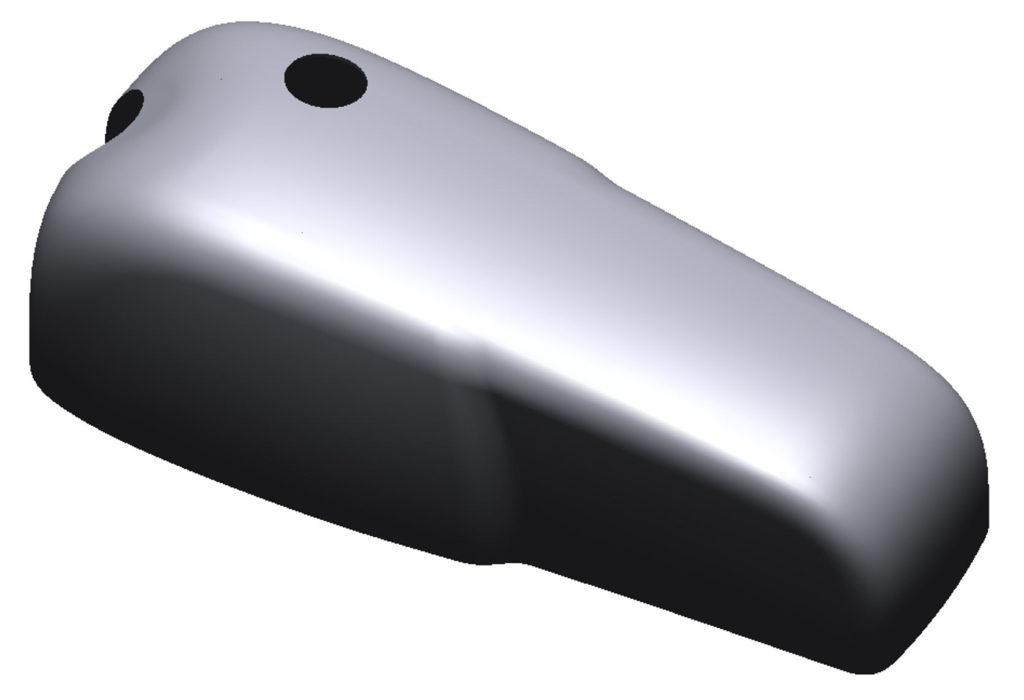
Aermacchi tank with basic surface finish
Then we check the curvature continuity, as seen in the plot, below.
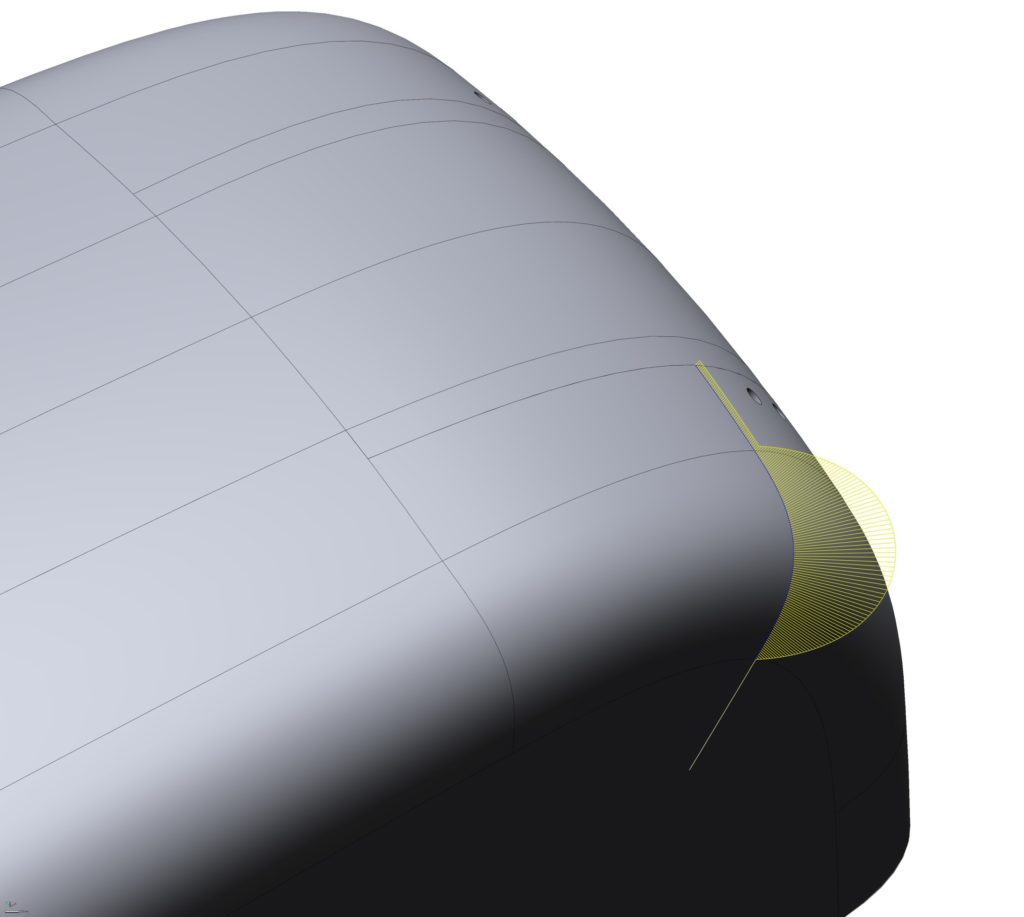
Aermacchi tank curvature plot
Then we re-check the curvature with a zebra plot.
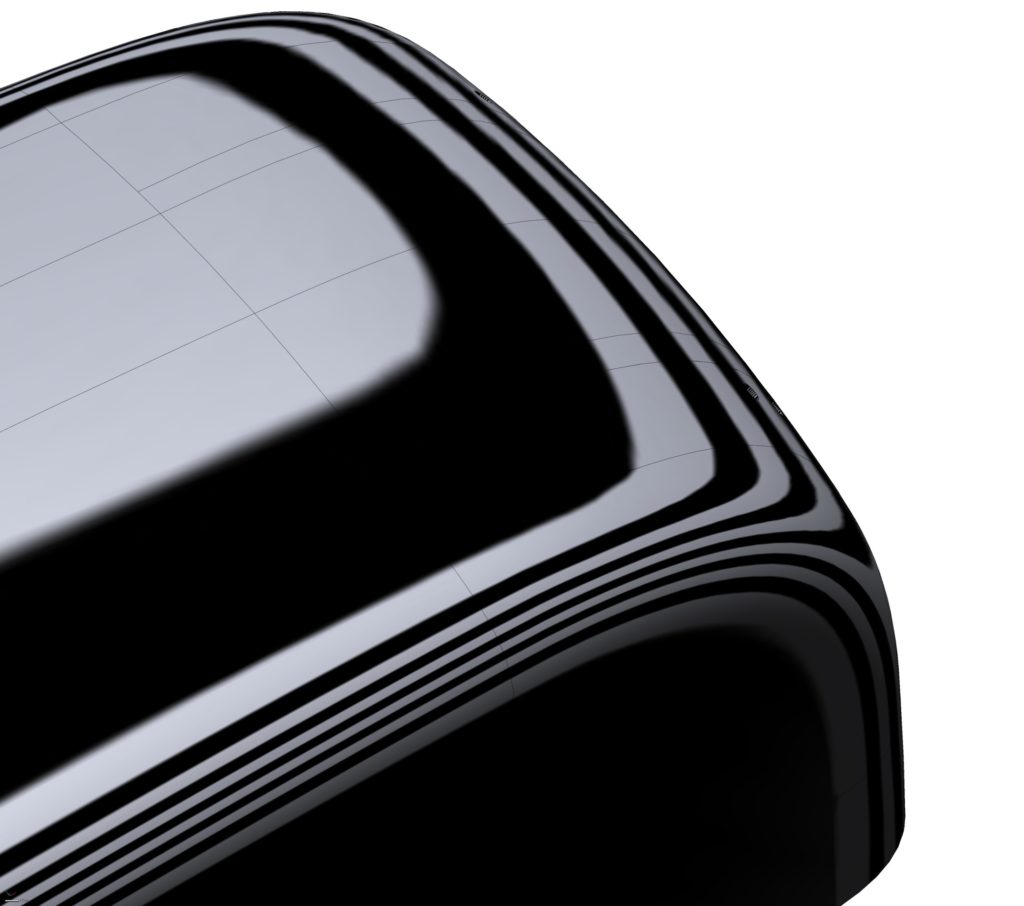
Aermacchi tank zebra plot
We will continue with the reverse engineering of this tank in future articles. We still have the following parts to design:
– Fuel filler bung
– Petcock bung
– Air vent bung
– Front brackets
– Rear brackets
Wanna little taste of the future? Boom. Exploded tank view!
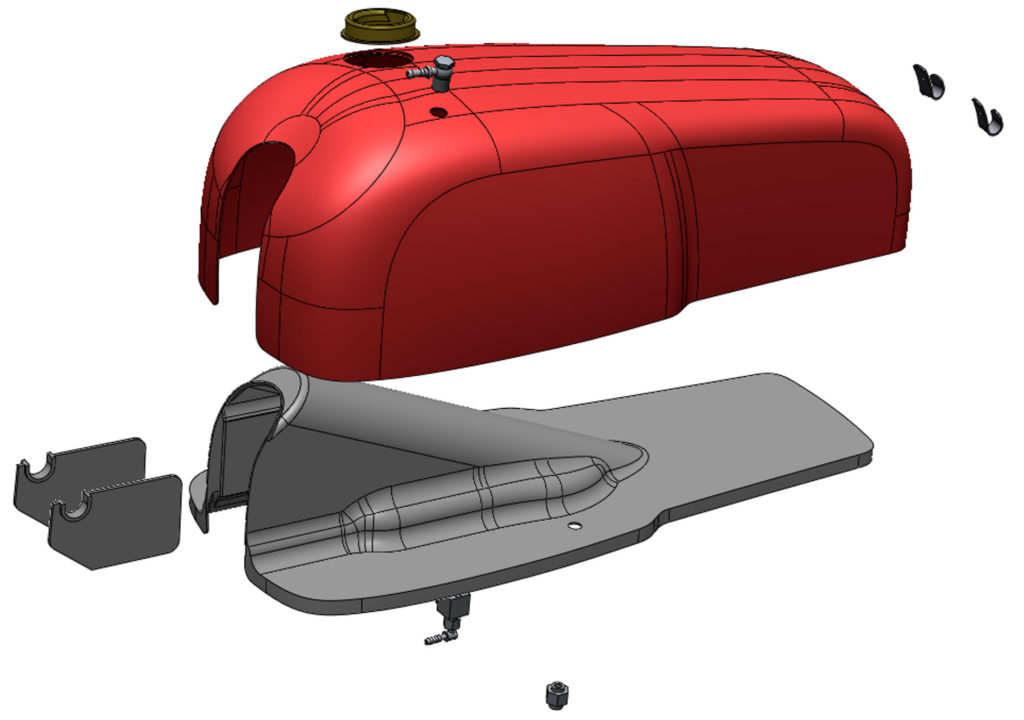
CRTT tank exploded view
If you like this article, please like/follow our Facebook page so you can get real-time updates to the articles we publish. Alternatively, sign up for our newsletter and we will contact you about new stories periodically.
[irp posts=”637″ name=”Reverse engineer an Aermacchi CRTT frame?”]