WWII wooden motorcycle workbench
Creating a workbench from the Fort Knox WWII motorcycle mechanics manual. Amazing.
Who wants to work on a motorcycle while on their knees? Nobody. Make a workbench!
While I was surfing Harley-Davison WL 45 sites, I saw a very nice wooden workbench made by Facebook user Danne. I contacted Danne and he shared videos of the use and photos of some of his improvements. Hunting down the original source, it seems it comes from a WWII manual called ‘Motorcycle Mechanics Handbook, The Armored School, Motorcycle Department, Fort Knox, KY’. Numerous American GIs passed through this camp and learned Harley-Davidson 45 WLA maintenance lessons.
Here are Danne’s videos. These are pretty inspirational. I hope many follow in Danne’s footsteps.
While ‘googling’ I also discovered another person that that goes by the handle of ‘Sarge’ on the Classic American Iron website forum, and he made the same workbench. Good discussion, details and lessons learned, on these pages:
- Classic American Iron discussion: http://www.caimag.com/forum/showthread.php?14913-Bike-Building-Workbench-Table/page2
- Sarge’s photo library for his build: http://s436.photobucket.com/user/Sarge_74/library/Army%20Ride%20on%20Lift?sort=3&page=1
- Sarge’s Fort Knox manual: http://s436.photobucket.com/user/Sarge_74/library/Fort%20Knox%20Motorcycle%201943%20Lube%20and%20Insp%20Guide?sort=3&page=1
I don’t know Sarge, so I thought best to just leave links to his materials and you can take a peek.
The source of our inspiration
Johan, the man behind www.liberator.be kindly gave me permission to use photos of these book covers, and the original plans for the stand. Simple stand, can be made at home or on the front lines of a battlefield.
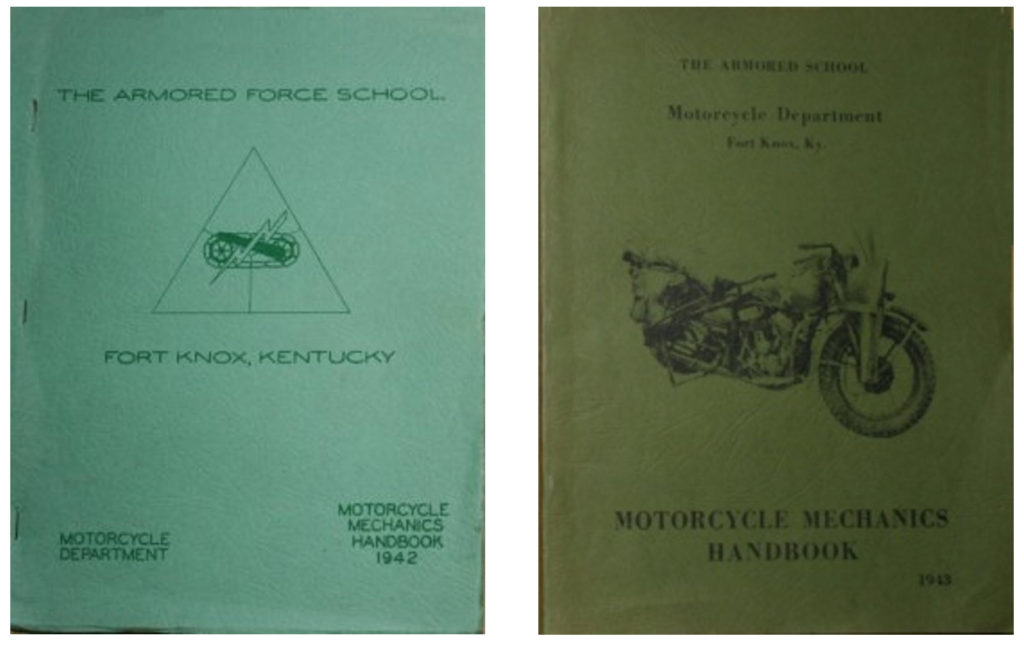
Johan’s Fort Knox Motorcycle Mechanics Manual 1942/943
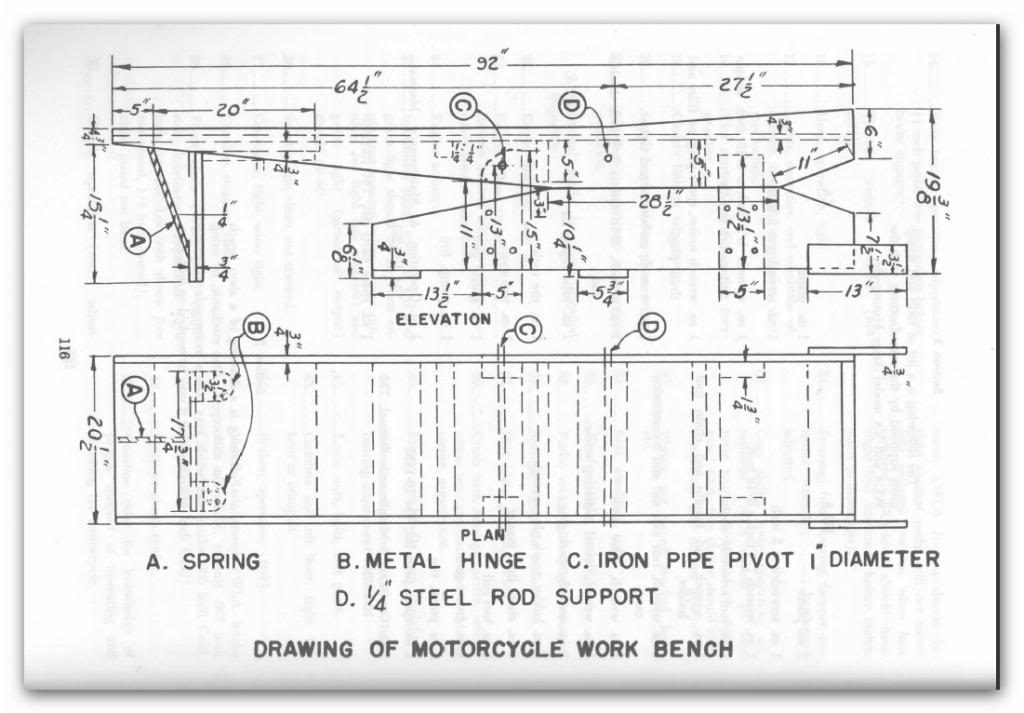
Original workbench layout – simple as can be.
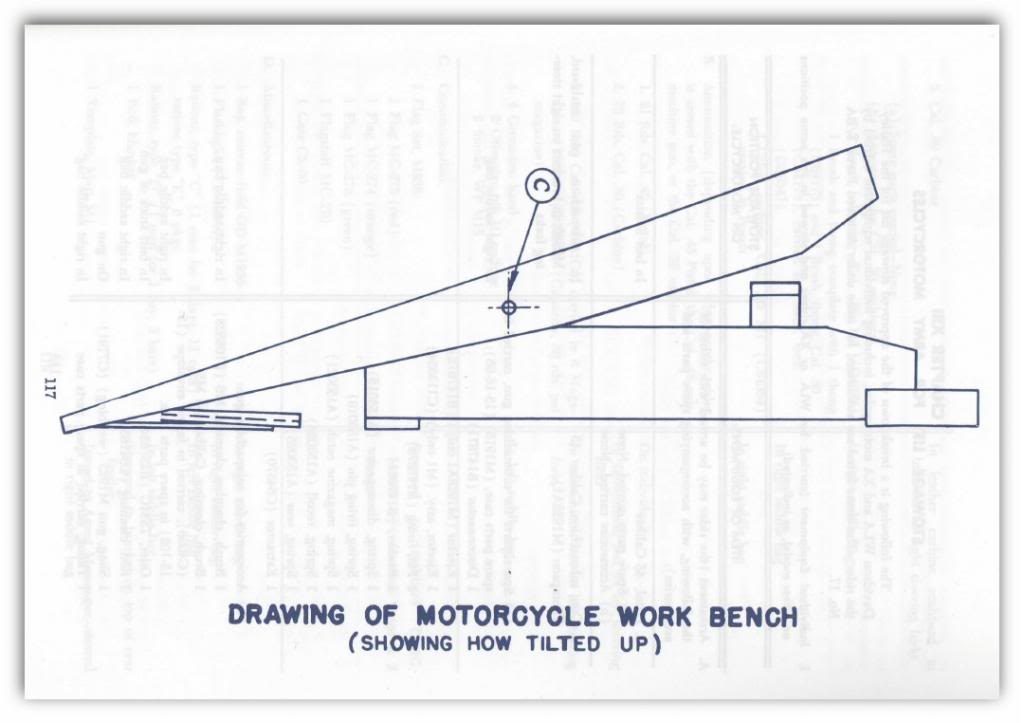
Original workbench – showing the pivot
Did we draw it correctly?
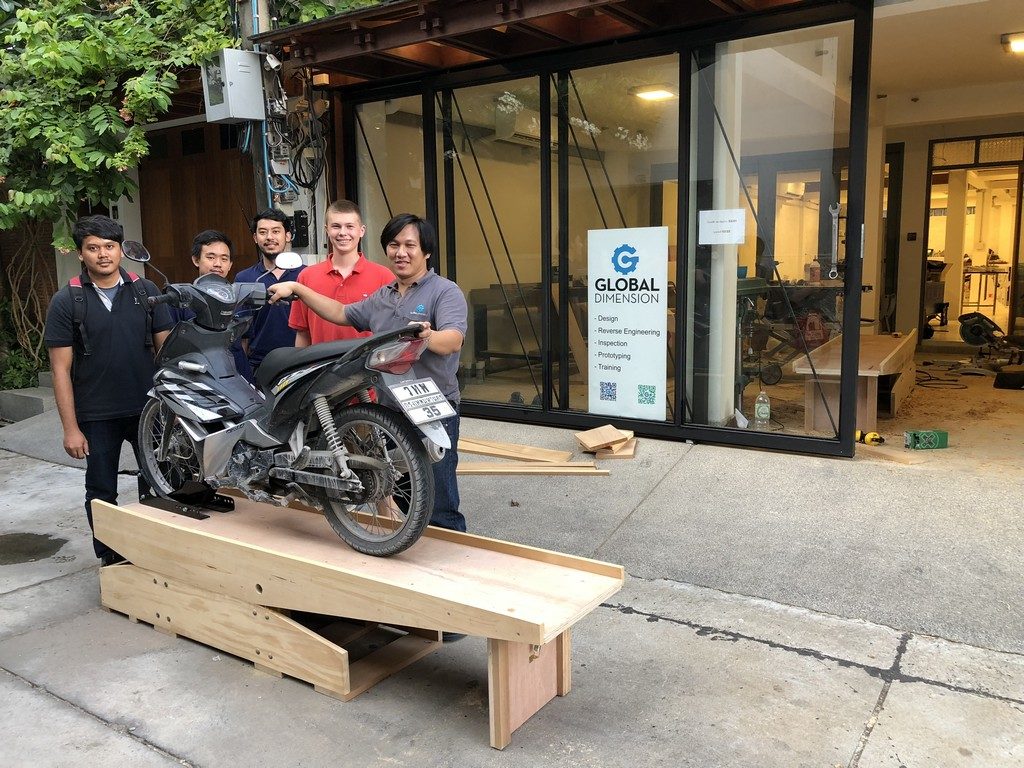
I thought it was such an elegant and simple design, I thought it would be a nice exercise for our Global Dimension team to re-draw the plans in a more modern 2D CAD format. You can download the plans at the bottom of the article.
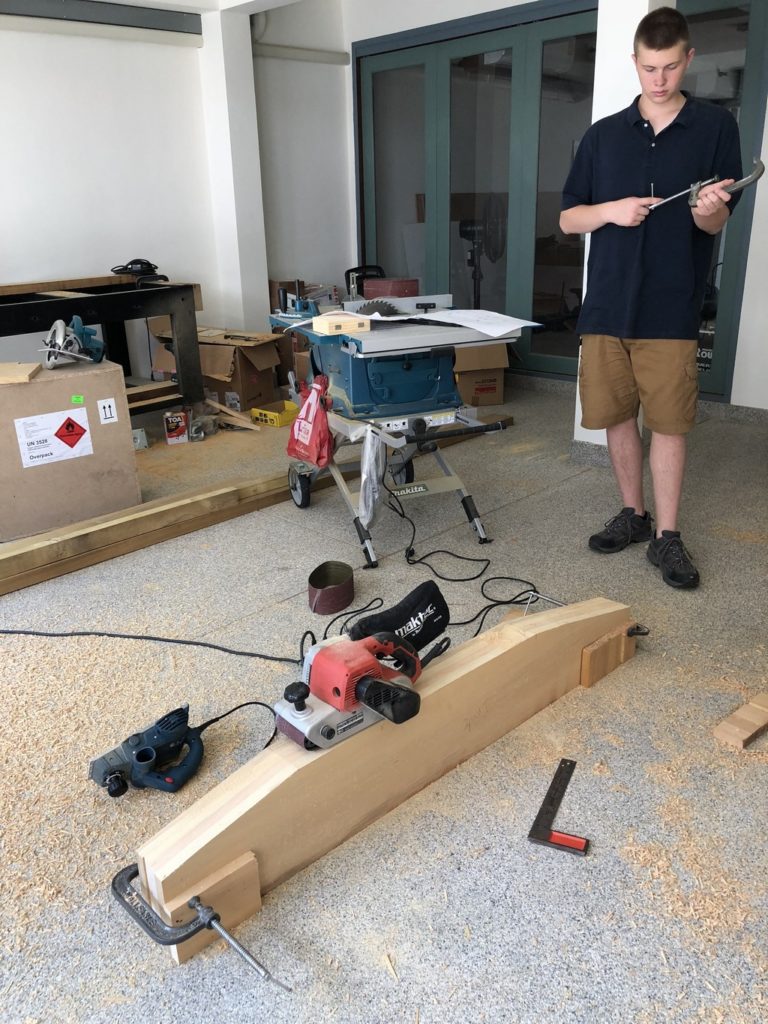
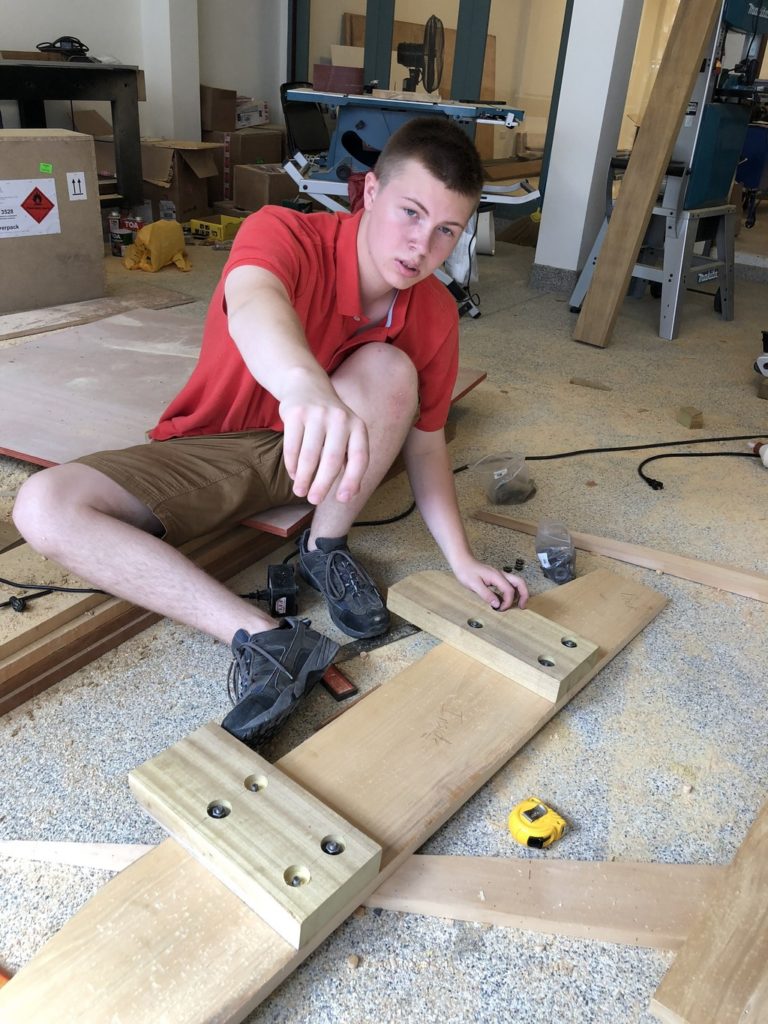
To test our plans, we decided to make 2 copies of the workbench. We offered a 2-week high-school internship to David Clement (18-years-old from Severna Park, Maryland, USA). I grew up with David’s father and gladly accepted the offer to have David help me make this plan become reality.
If you want a high-resolution PDF copy of the drawings, please feel free to contact us, we will email it to you.
We made the drawings in inches, and we used the American sized wood dimensions. Your wood, depending on your location on the planet, could be a different size. The wood we used in Thailand is full sized, so a 2 x 6 really is a 2 x 6! A 2 x 6 in the USA is 1 1/2 x 5 1/2.
How does it look?
Much better than what we started with!!
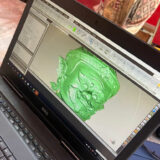
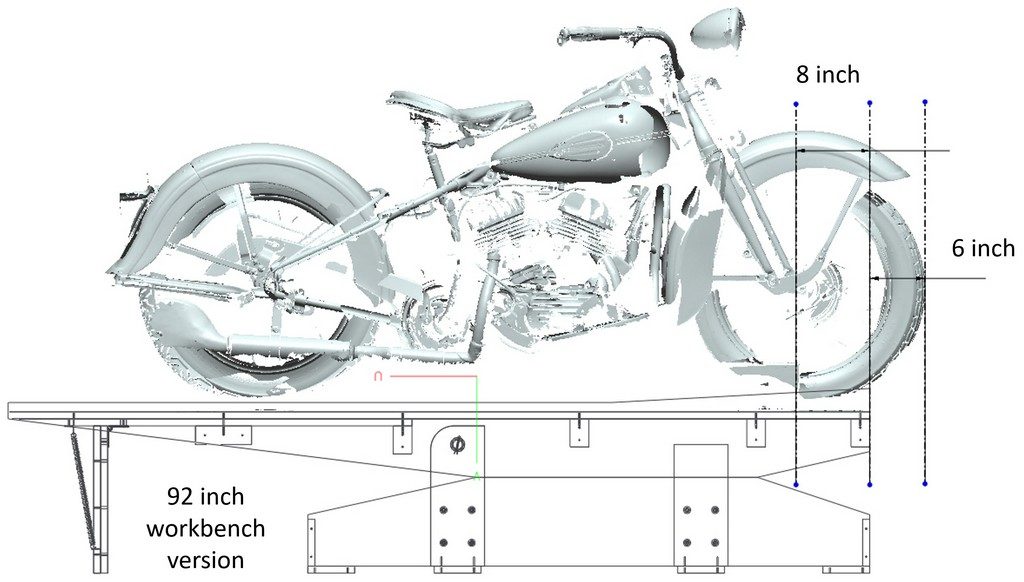
We scanned a few motorcycles in the past, and we can now use that to visualise where the bikes sit on the bench. More important, we want the engine mass to be in front of the pivot point, so we can be assured the workbench will actually go horizontal at some point!
Does it fit? It was designed for Harley-Davidson 45.
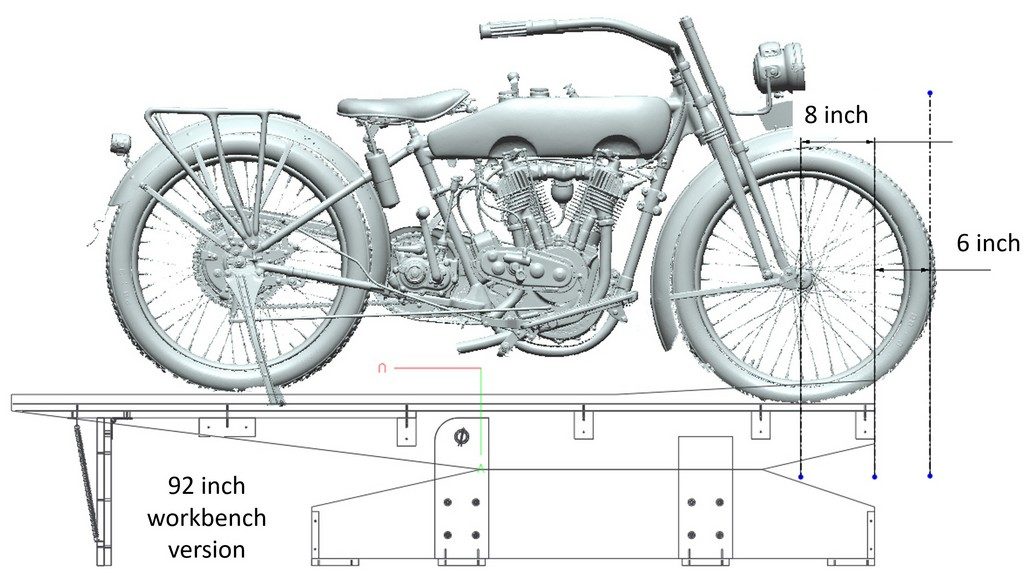
Harley-Davidson JD fits well!
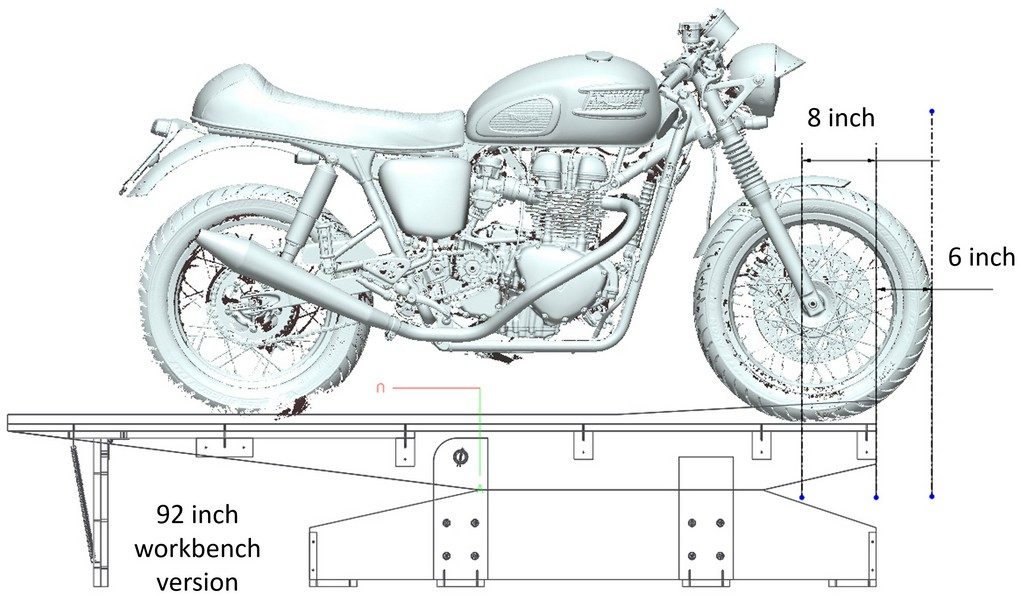
2014 Triumph Thruxton also fits!
Shopping for supplies!
In Bangkok, there is no single mega-hardware store to buy wood, springs, good screws, lag bolts, wood glue. There are giant mega hardware stores, but they are a bit lacking and tend to sell steel and not wood. They have screws but are usually very cheap Philips head that are simply not as good as modern Torx head screws. Basically, cheap junk is often sold at these mega stores. So we had to go and track down each item we wanted, individually.
Here is what we bought. All measurements are in inches, as this is what they used in World War II Harley-Davidson manuals. Interestingly, most things like wood, screws, and many other items are sold in “inches” in Thailand.
- Wood; 2 x 6 inch, 1 x 10 inch, and 4 x 8 foot plywood (first store on the right on ‘Wood Street’ Bangkok, everyone knows ‘Wood Street’))
- Steel pipe for the pivot; we used 1-inch ID galvanised water pipe.
- Screws (expensive, critical); we used SPAX from Germany. Torx T-20 head. Worth every penny (baht). From www.homebuilders.co.th.
- Screws (cheap, non-critical); cheap 1 1/2 inch Philips screws from ‘Thai Watsadu’. Wished I used SPAX, but did not have any.
- Bolts; 3-inch carriage bolts, 17 per bench.
- Glue; Gorilla glue from the USA. https://www.facebook.com/GorillaGlueThailand/
- Spring; we bought 3 different springs from the “spring store”, not knowing what would work. See picture below.
- Other hardware: small clamps, u-bolts
The pictures really tell the story of collecting the materials. Construction photos are below, be patient!
Shopping!

You need wood, you go to the wood store.

You need a spring, you go to the spring store.

You need carriage bolts, you go to carriage bolt store.

You need wheels, you go to the wheel store.

You need to laugh? You go to the block & tackle store.

1 inch OD galvanized pipe purchased on Sukhumvit Soi 15 area.
Let’s cut some wood!
Rough lumber in Thailand is generously proportioned. This means when you buy a 2 x 6 inch piece, it is usually 2 1/8 x 6 1/8. This allows you to put it in the thickness planer/jointer and will a little skill you actually get a full 2 x 6 inch pieces of wood. In the USA (for example), if you buy a 2 x 6, it is actually a 1 3/4 x 5 1/2 (quite small!). We have very ‘manly wood’ in Thailand 🙂 .
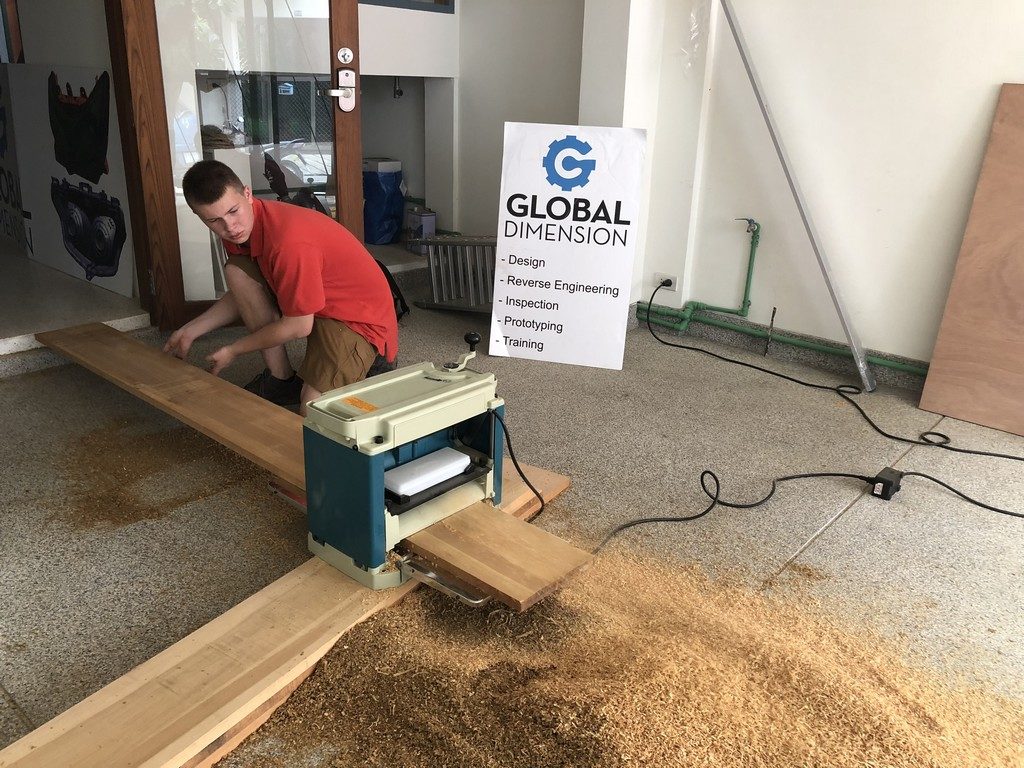
Most lumber is sold pretty rough, so a thickness planer is a must.
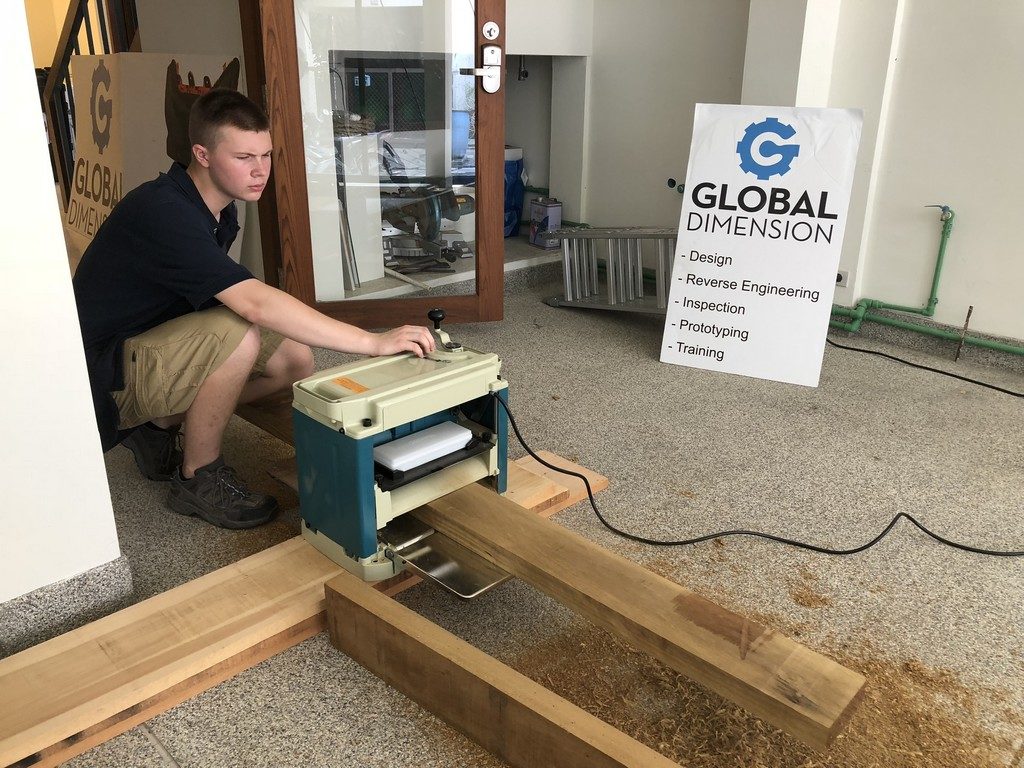
Planing the big 2×6 wood.
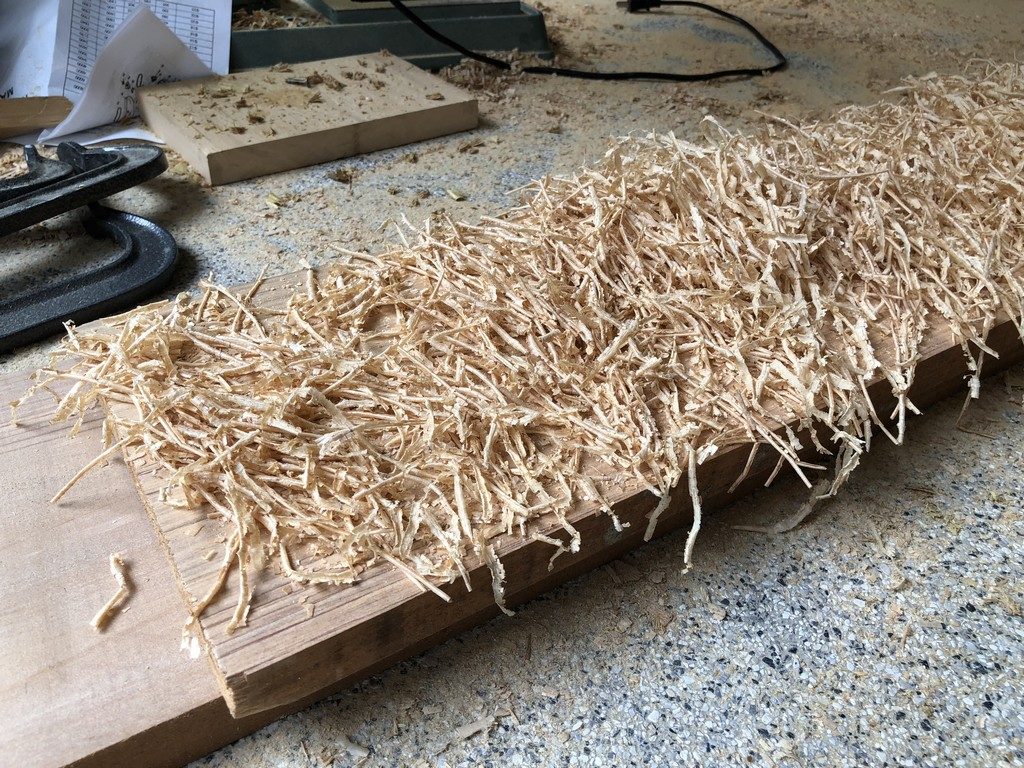
We planed all the wood, the blade was sharp and the wood a willing partner.
Tips for cutting the big pieces
We discovered a sequence of the cutting that will greatly aid in making this workbench.
Top of workbench:
- Cut the top sides to exactly the same length (so they match each other, does not really matter if you are a little long or short).
- Cut the 1/4 deep x 3/4 wide groove with a router. You will need to clamp an 8-foot straight edge or use a router table, as it needs to be straight.
- Cut the angled cuts.
- Clamp the top pieces together. Since we made 2 workbenches at the same time, we clamped 4 pieces together. Use a belt sander/planer to make them identical.
- Things that are critical is the bottom (the edge that is approximately 35 inches long) of the top piece needs to all be exactly the same length, as these parts will mate with the bottom half of the bench.
Bottom of workbench:
- Make them all the same length.
- When marking where to cut the angles pieces off, make sure the bottom matches the top. Those mating surfaces of the top workbench and the bottom workbench must match, in their length and position (relative to the front of the workbench). Forget the plans. Put the top and the bottom pieces next to each other and make that mating area match in length and offset from the front. Read again, get this right.
- Cut the angled parts out. Good luck.
- Clamp both bottom pieces together and hit with the belt sander to make identical (in our case we clamped 4 together as we made 2 workbenches), picture provided below.
Legs:
- The big chunky 2 x 6 inch ‘legs’ are cut next. Nothing magic here. The front legs should get a 45-degree bevel cut, so the top does not bind then closing.
- The leg with the pivot gets a 1/4 circle cut off it. We used an old plastic pot to draw the circle, it does not need to be perfect. We used the belt sander to make it perfect!
The platform: Nothing special about cutting the plywood deck. The more accurate the better, as it needs to be smooth and parallel to fit into the groove you cut in the to side panels. If it is a sloppy cut, you will really have a difficult time putting the top together. Take your time. Breath deep. Touch up with a belt sander!
DO NOT CUT THE SIDE BRACES UNTIL LAST (these are the 2×3 and 2×6 just under the plywood deck). Why? You cannot cut their length correctly from the drawing unless you are a human CNC machine and can cut your plywood top deck to a precise width on the plans, and thickness plane the sides to 1/32 inch accuracy, and cut that 1/4 slot to exactly 1/4 inch, because the additive error in making all those cuts will make the exact width different than that on the plans. Assemble the top first with the 2 sides and the plywood top deck, and then cut the 2×3 and 2×6 cross braces to match the width of your unique workbench top.
BIG TIP: Clamp sides together and use the belt sander to make them all the same.

Marking where make a slot 1/4″ D x 3/4″ W for the plywood.

The slot that holds the plywood. We used an 8.5-foot ruler as a guide.
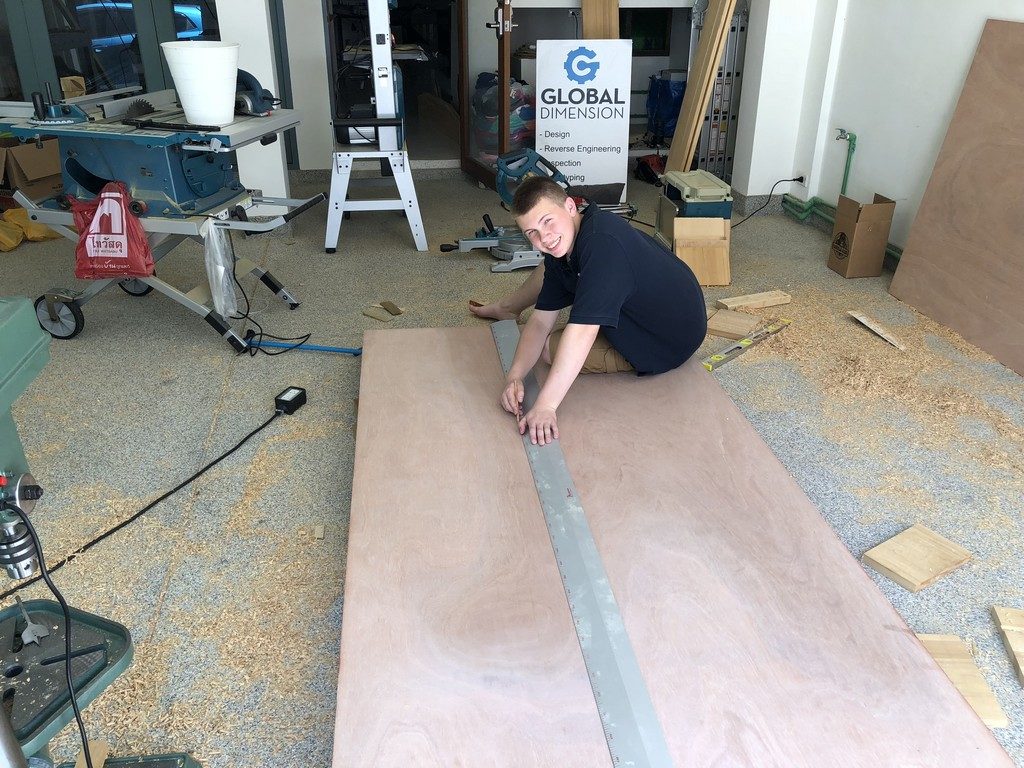
Check out our 8.5 foot (2.5 meter) ruler!
45 degree chamfer so the top does not bind when closing.
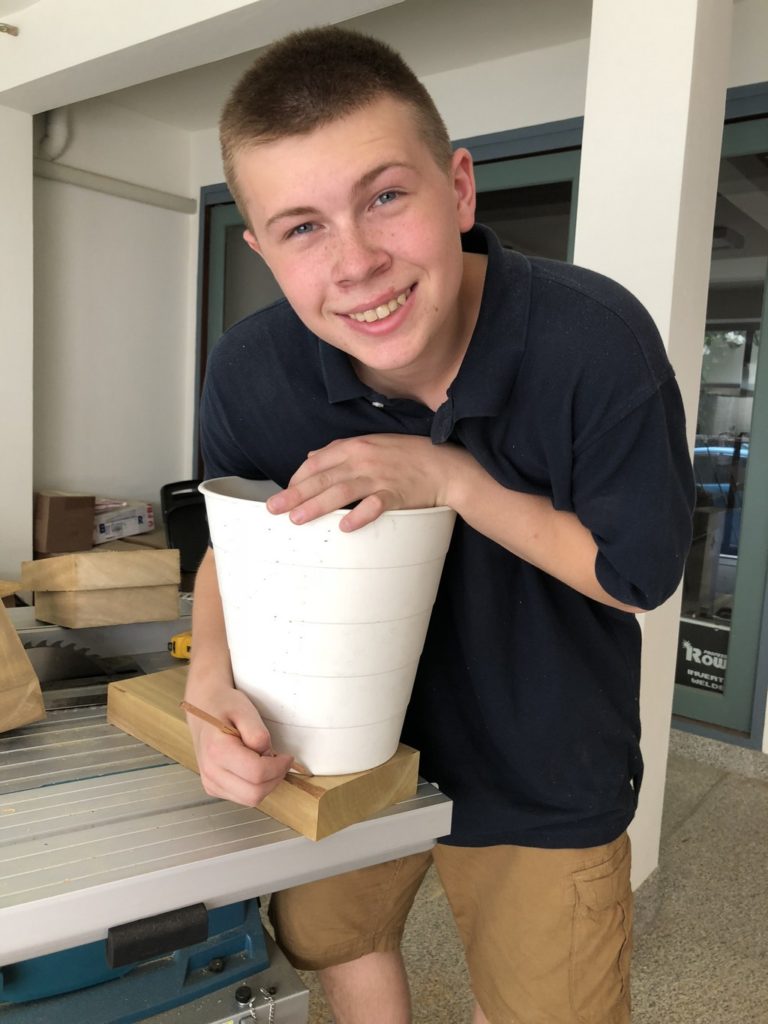
This is our precision plastic pot that helps us draw circles.
‘Real magic’ is the assembly sequence
The top of the workbench just gets assembled, with a minimum of issues.
For the plywood deck, we simply put glue on each edge, and we put glue into the slot we routed, and put them together and clamped lightly. We clamped it upside down, as this way the plywood was low to the ground and we could next install the 2×3 and 2×6 side braces. Each of these side braces length is custom cut for its position. The entire top starts to get pulled together when you put the 2×3 and 2×6 braces in place, as they are glued and screwed in from the sides, and at this point, the top is snuggled together.
Remember, we used another layer of plywood at the start of the ramp, and it goes under the braces. We glued and screwed that extra layer to the plywood top deck, as you can see in the pictures. The last two pieces of 2×3 and 2×6 braces hold down this second layer of plywood rather nicely. We then flipped the entire assembly right-side-up and put more screws through the top deck into the 2×3 and 2×6 cross braces. This thing is now officially ‘over-built’. Very strong.
For extra credit, we used wood plugs to cover up most screws on the sides. Sure looks great!
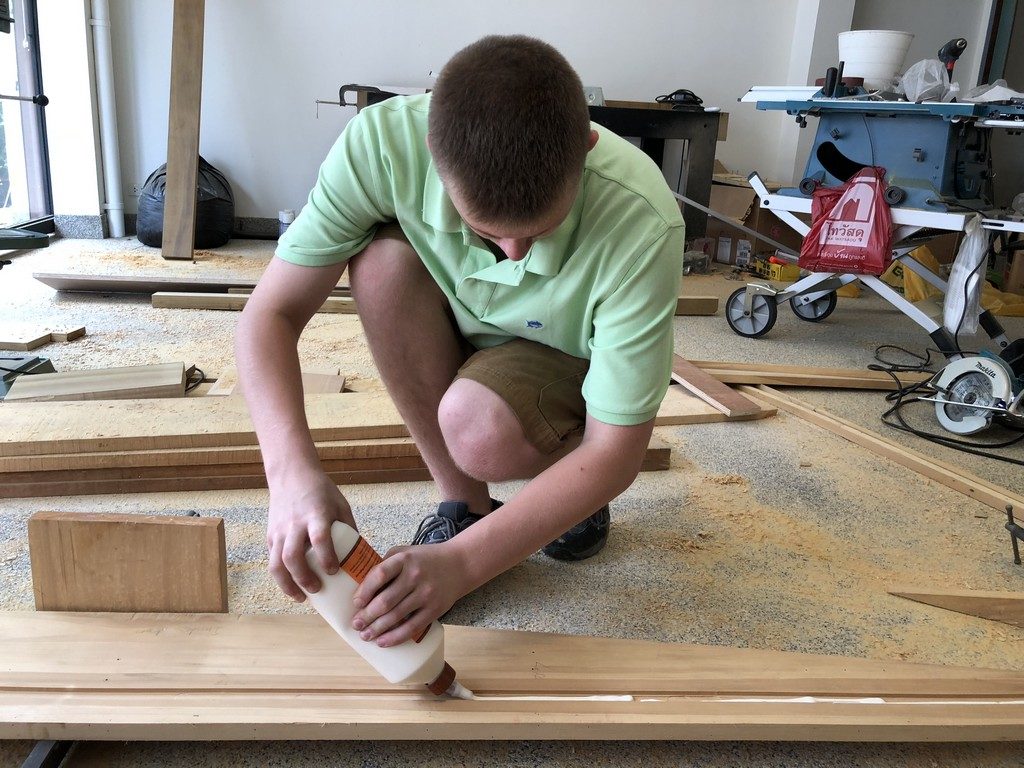
We used Gorilla glue in the slot that holds the plywood.
Big fat cross brace is a full 2 x 6.
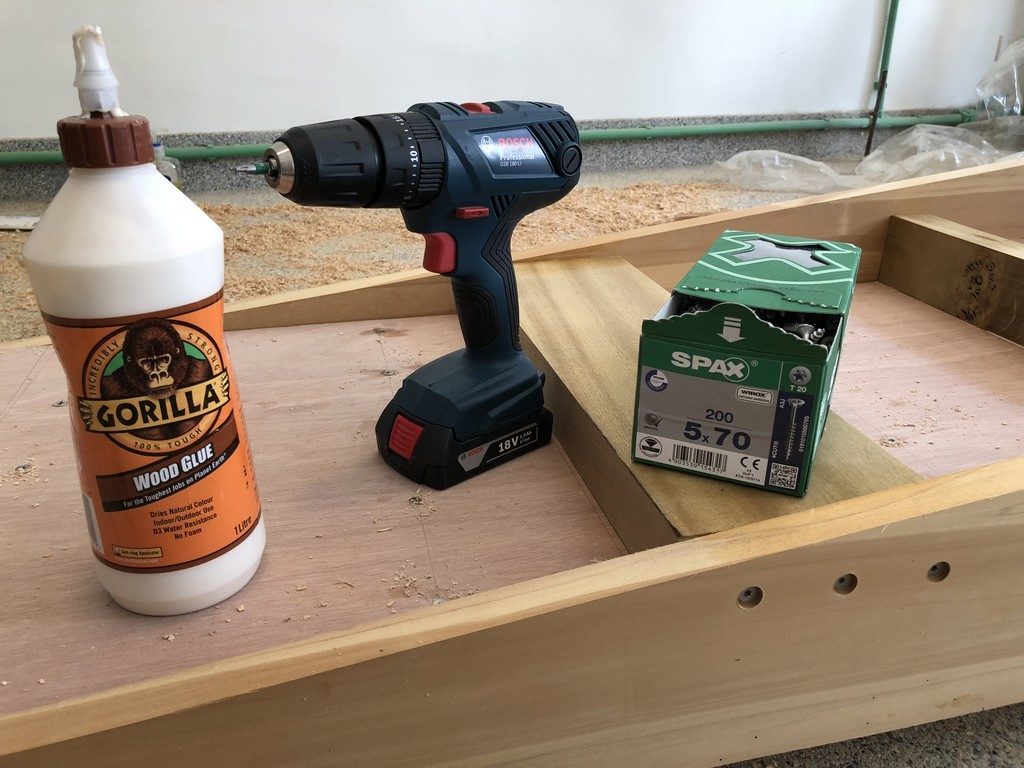
The weapons of construction.
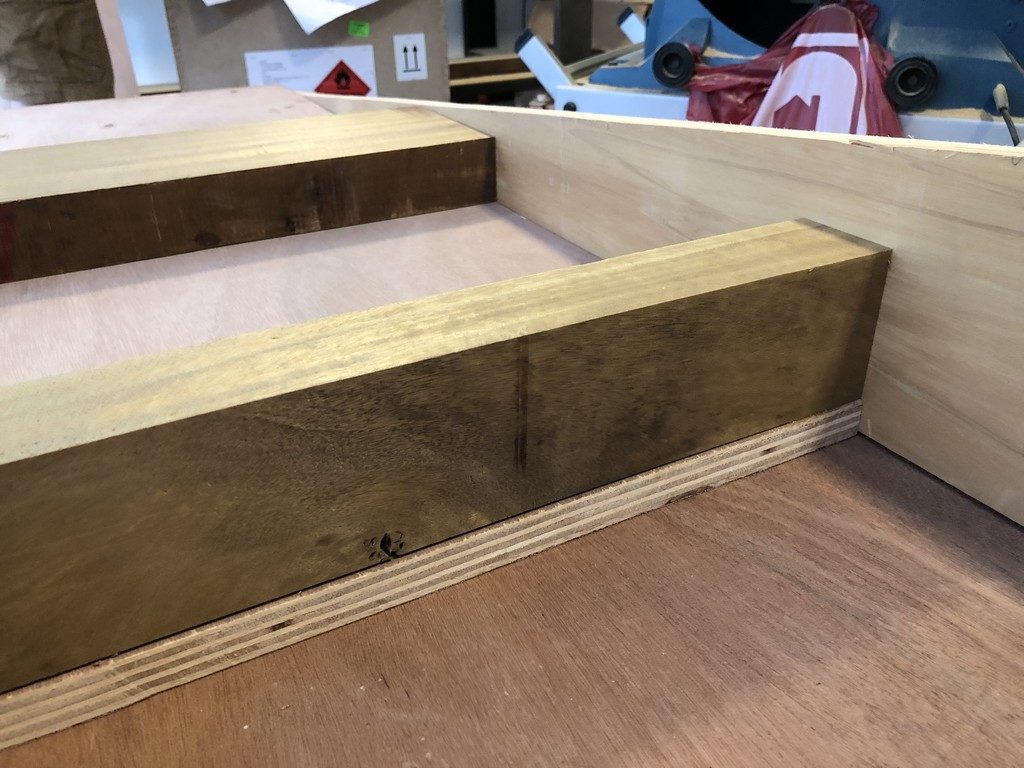
The second layer of plywood terminates under this brace.
Double plywood, and the 1/4 inch recessed groove for top layer.
Holes ready for plugging.
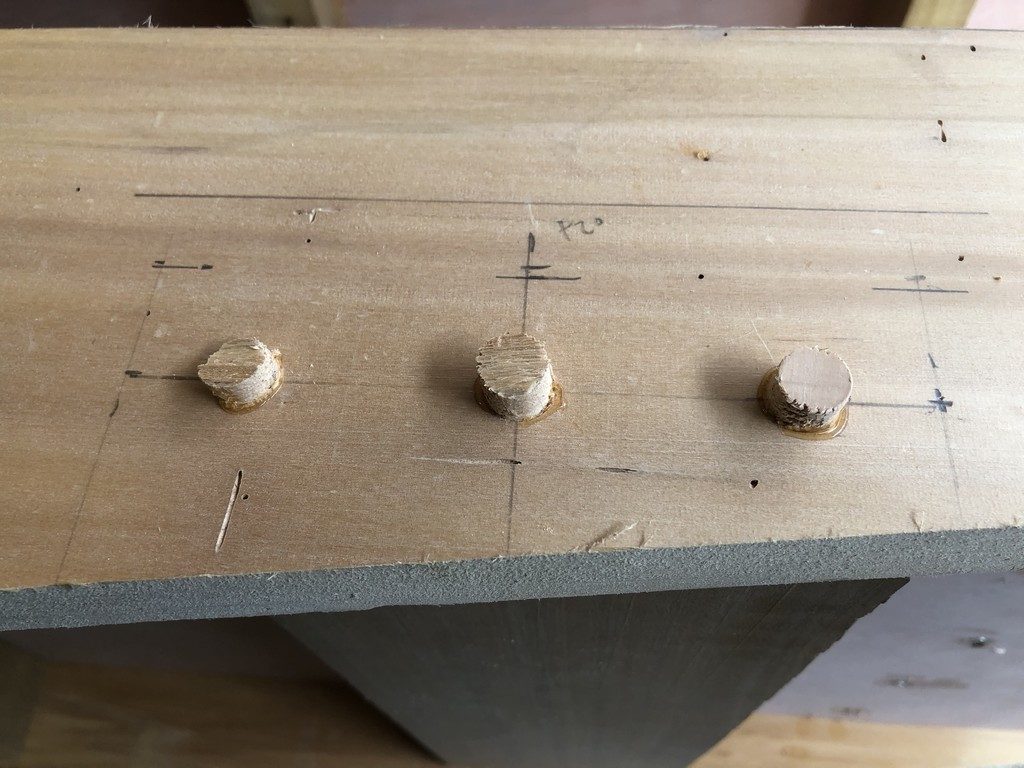
We did a lot of planning and plugging.

Wood plugs – be gone!
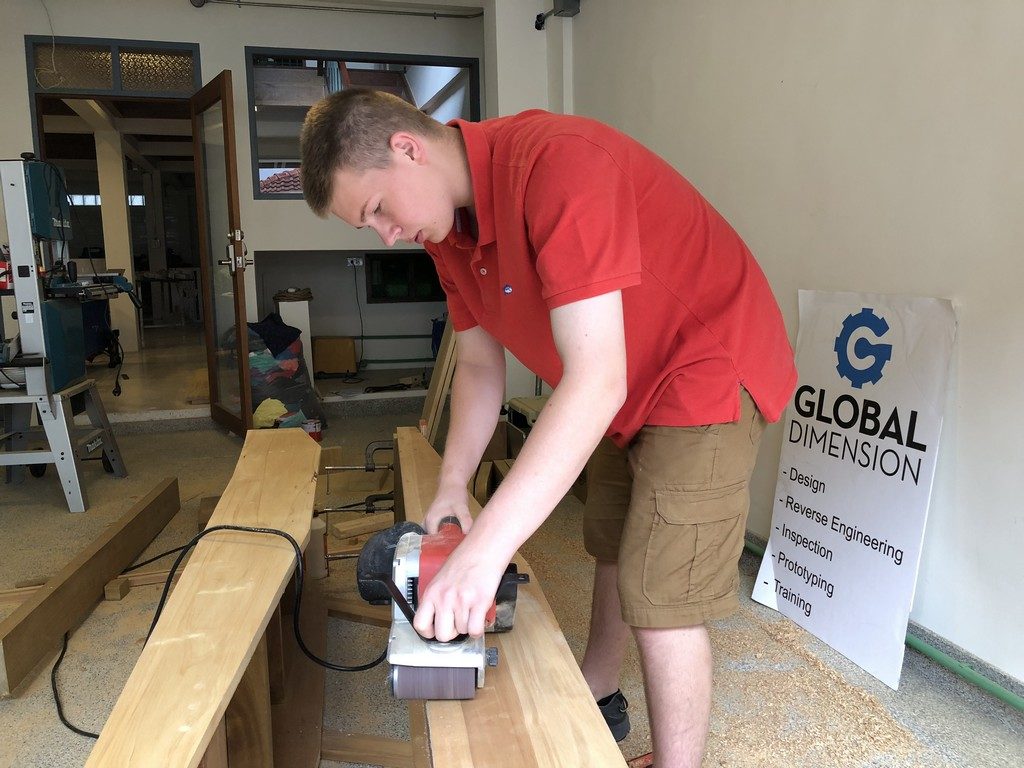
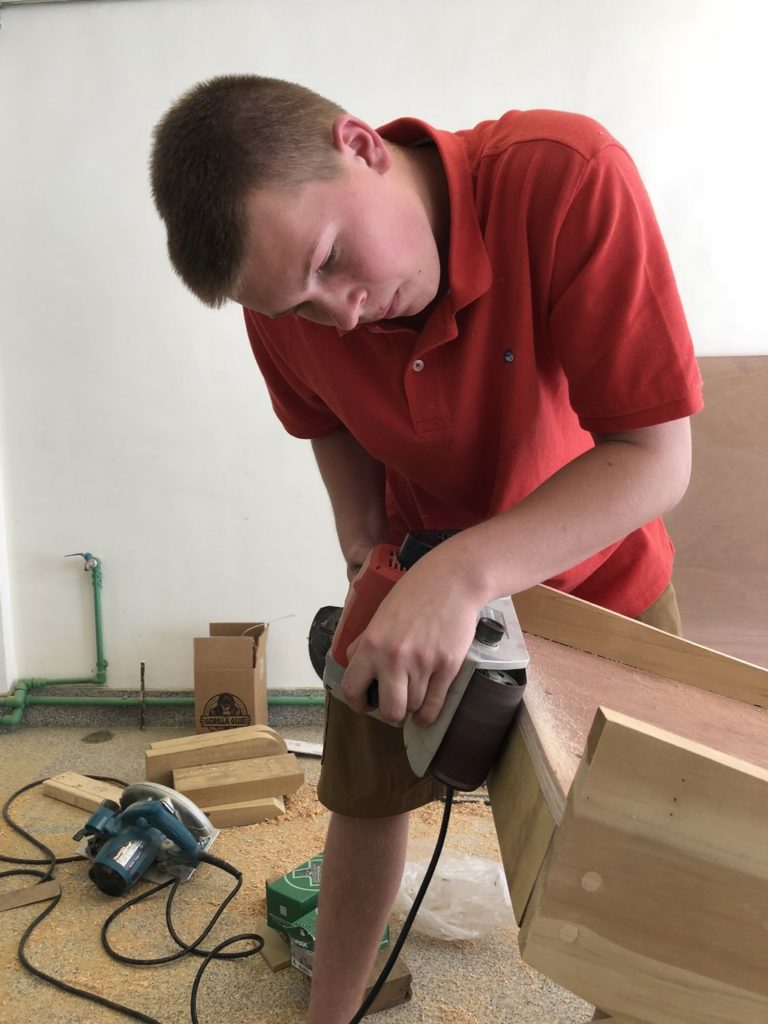
The man can finesse a belt sander.
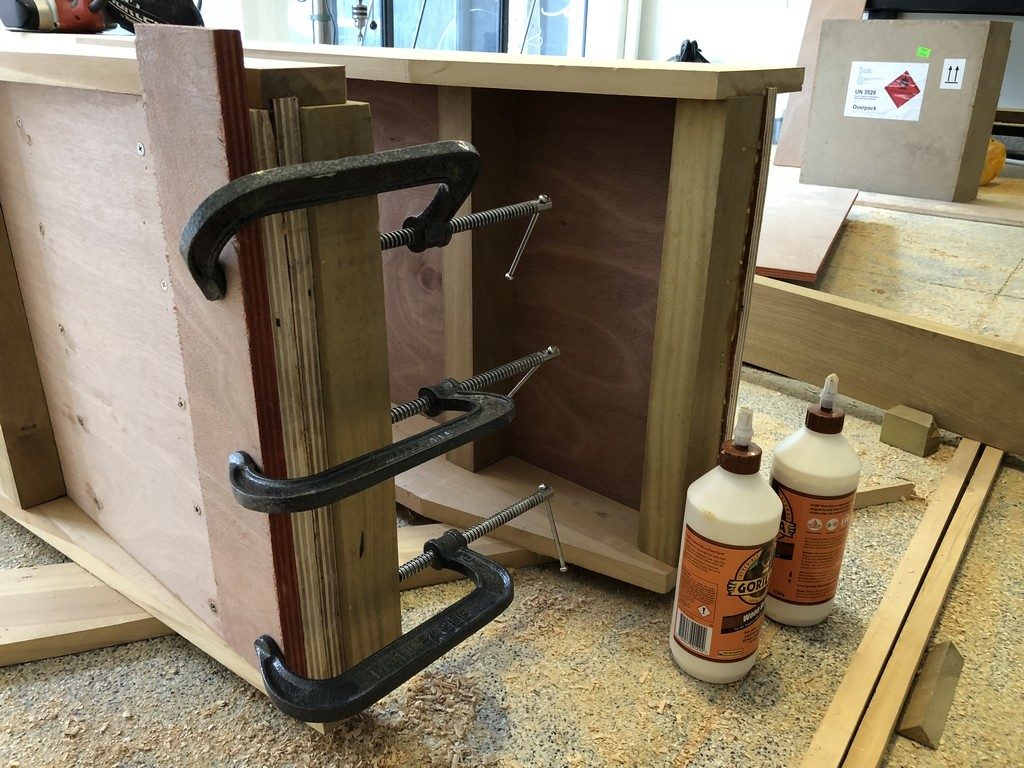
Clamping the glued & screwed double layer plywood.
If it is not flush, force it to be flush!
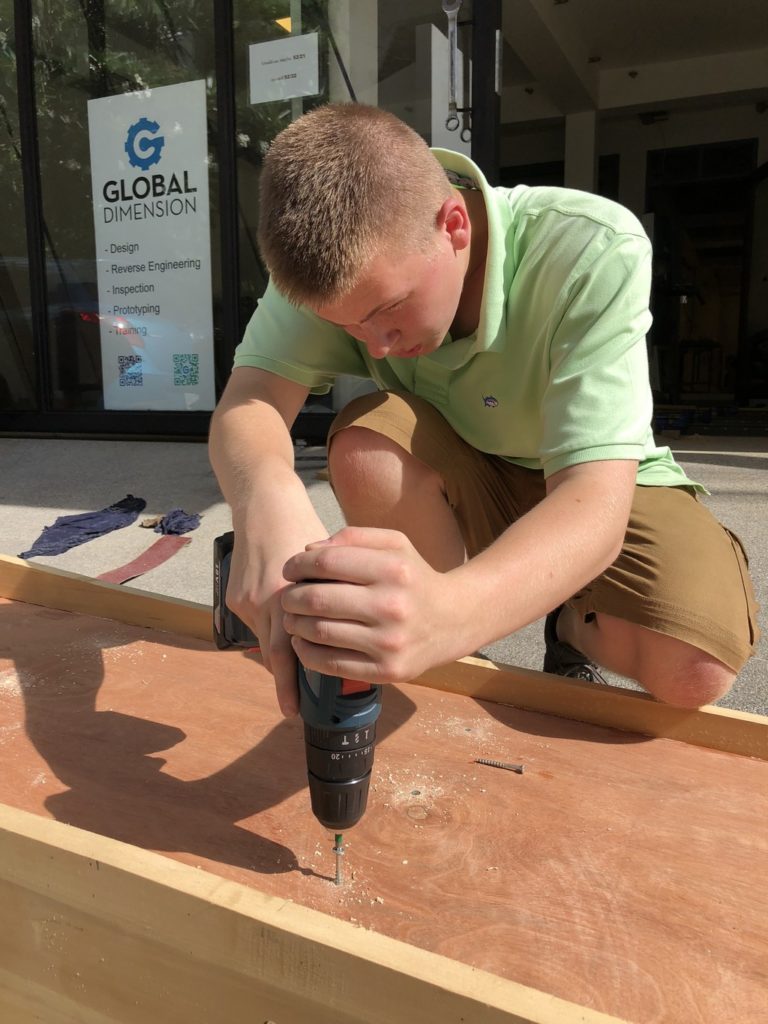
Proper deck screws going into a 2×3 brace. SPAX brand Torx screws – awesome.

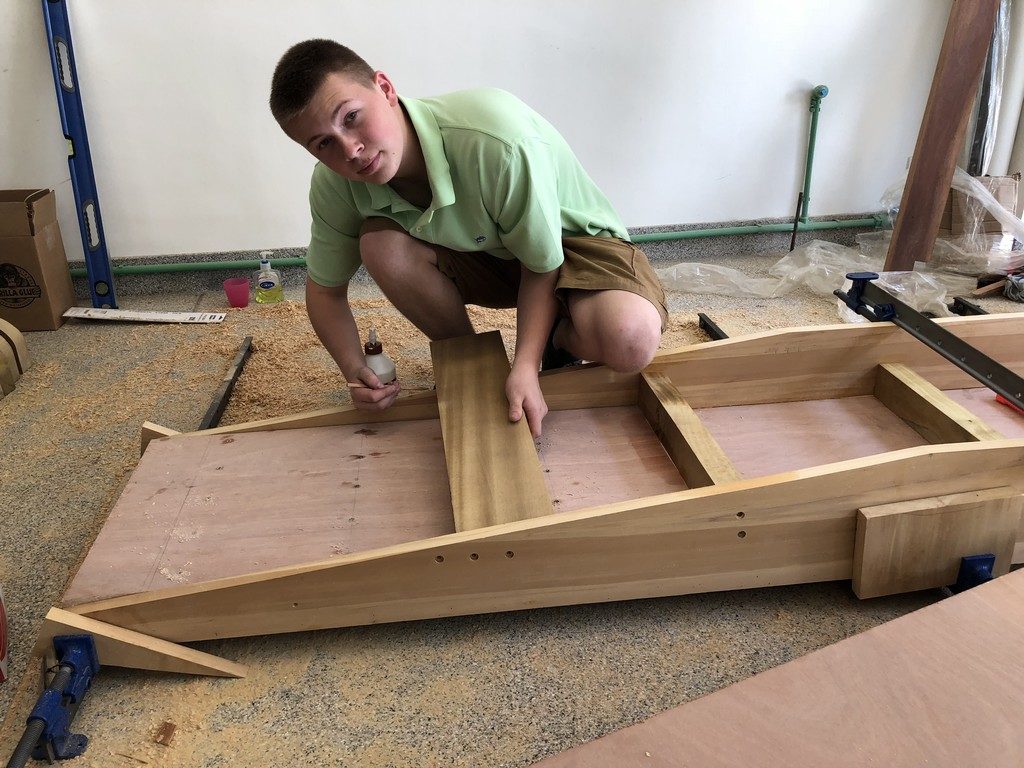
Getting rid of excess glue, before it gets too hard. Or chilling-out? You decide.
You want the bottom to line up with the top, right?
Now you have the top built, it is time put together the bottom.
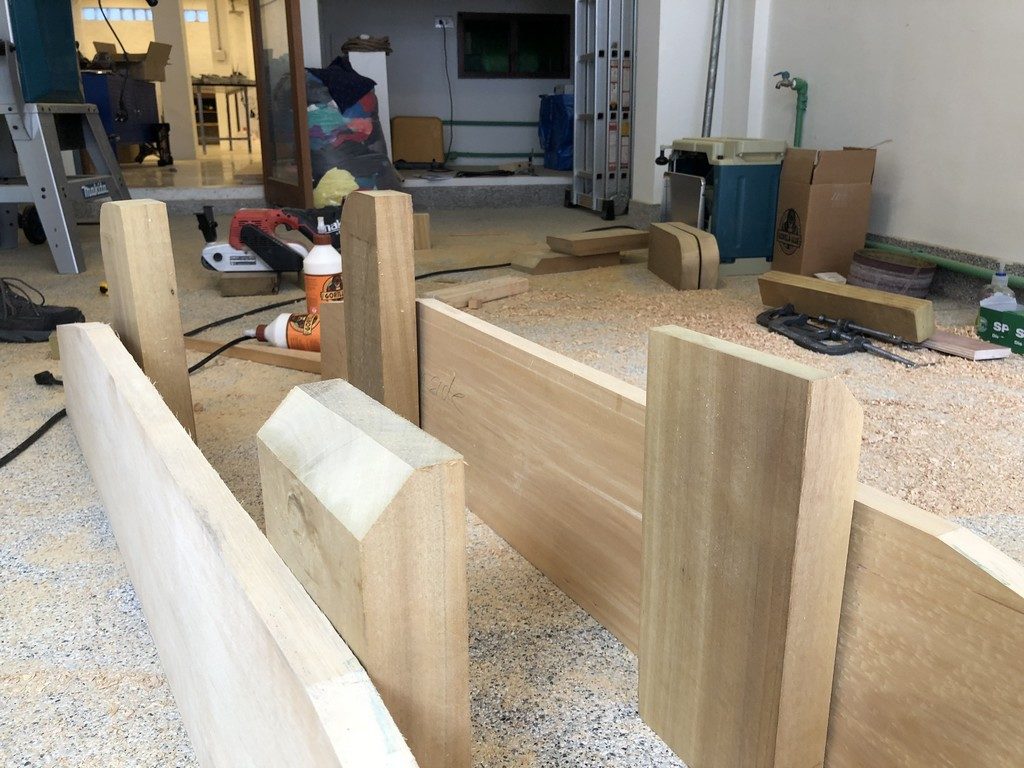
The first thing we did was to bolt the 2×6 legs to the side panels with the carriage bolts. We countersank the nuts/washers for the carriage bolts, as we wanted a nice open area under the workbench to store tools (more on that later).
We are now finished with the bottom sides assembly.
Counterintuitively, we cut the ‘feet’ from 1×6 at this point. We did this because we want the bottom side panels to be parallel to the tops side panels, for both smooth functioning and for making it look great. We turned the top upside-down and laid it on the floor We now know the custom lengths of each of the 4 feet, as they would be the exact width of the upside-down top! When we measured the width where the 4 positions of the feet were going to be, each measurement was a little different due to our inaccurate cuts. We marked them as foot 1,2,3 and 4 so we could use them in the next step of the assembly.
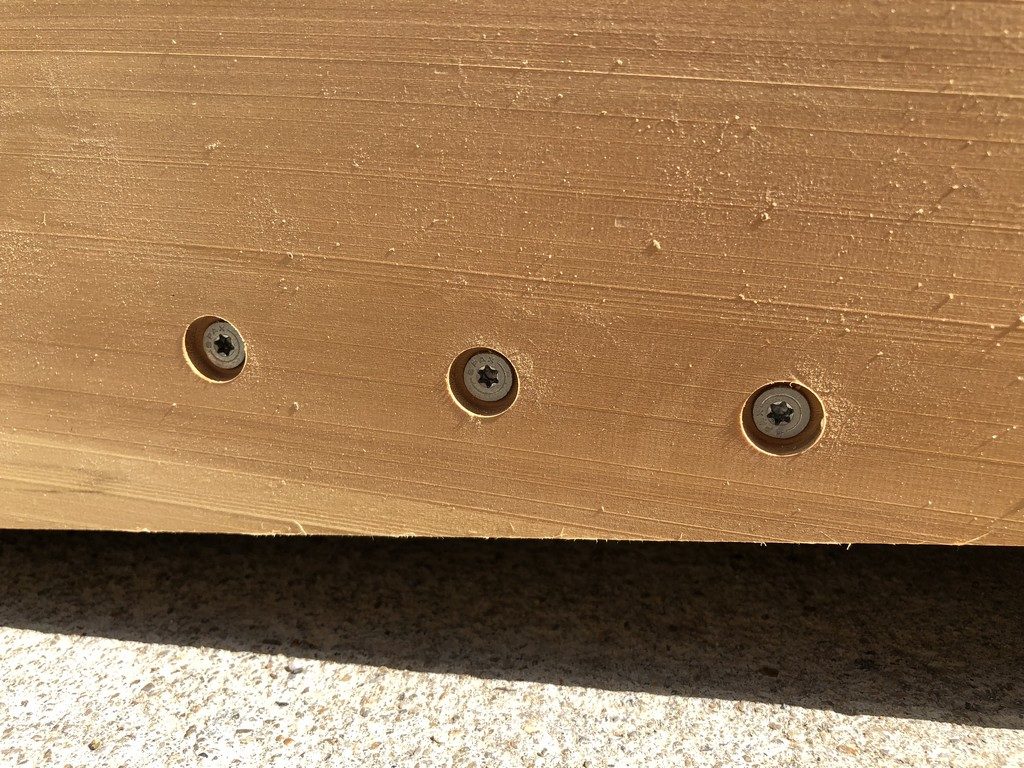
To do the final assembly of the bottom, we placed the bottoms right and left side in the up-side-down top. We put the feet marked 1,2,3 and 4 in their correct positions and screwed them in place. We counter sunk the screws 1/4 inch so they would not scratch someone’s epoxy floor. The bottom is now finished!
“Can you hand me a nut?”
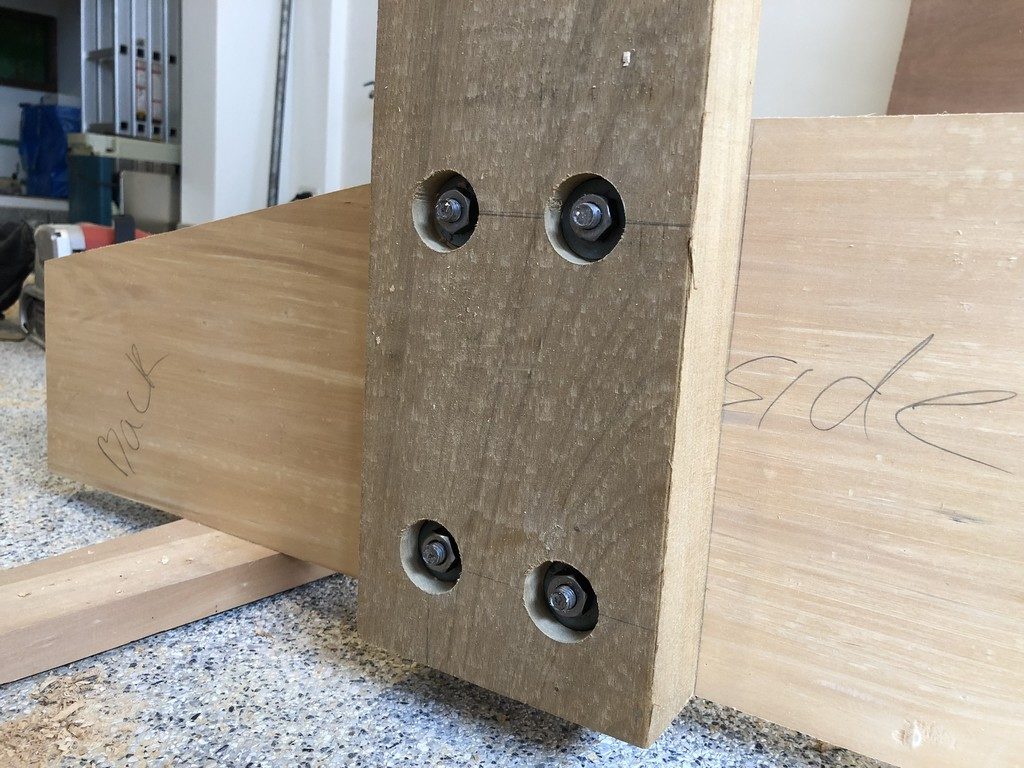
Recessed the main bolts, so hands won’t get cut when reaching for tools.
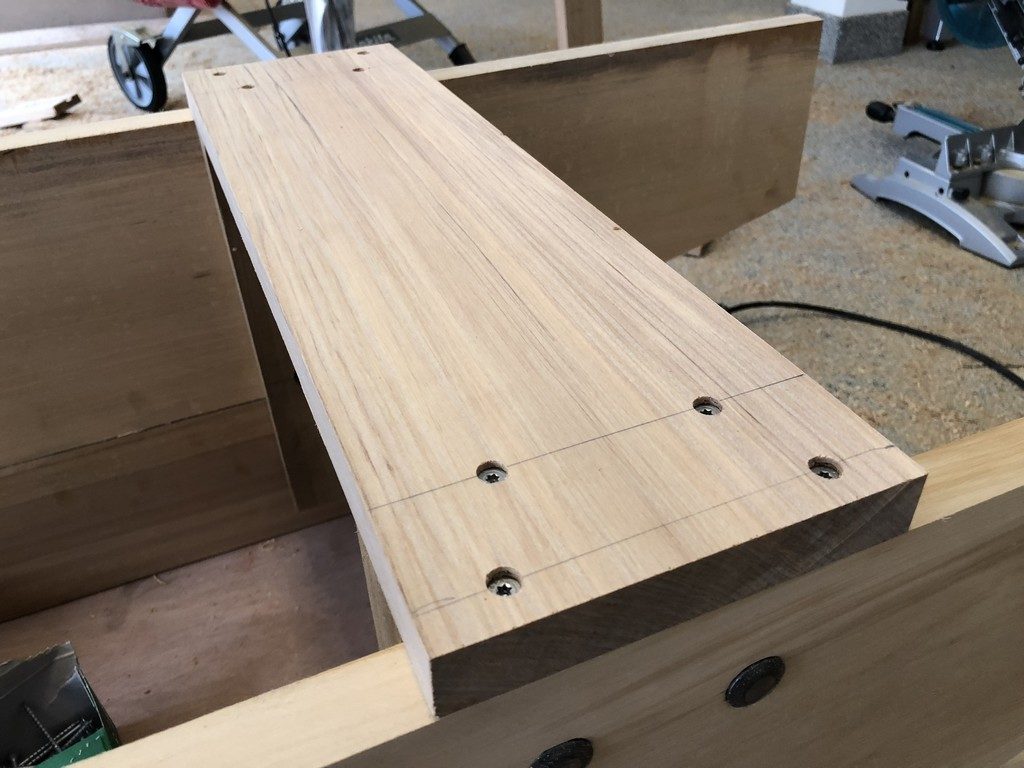
Recessed screws in the 4 feet, so it won’t scratch your pretty garage floor.
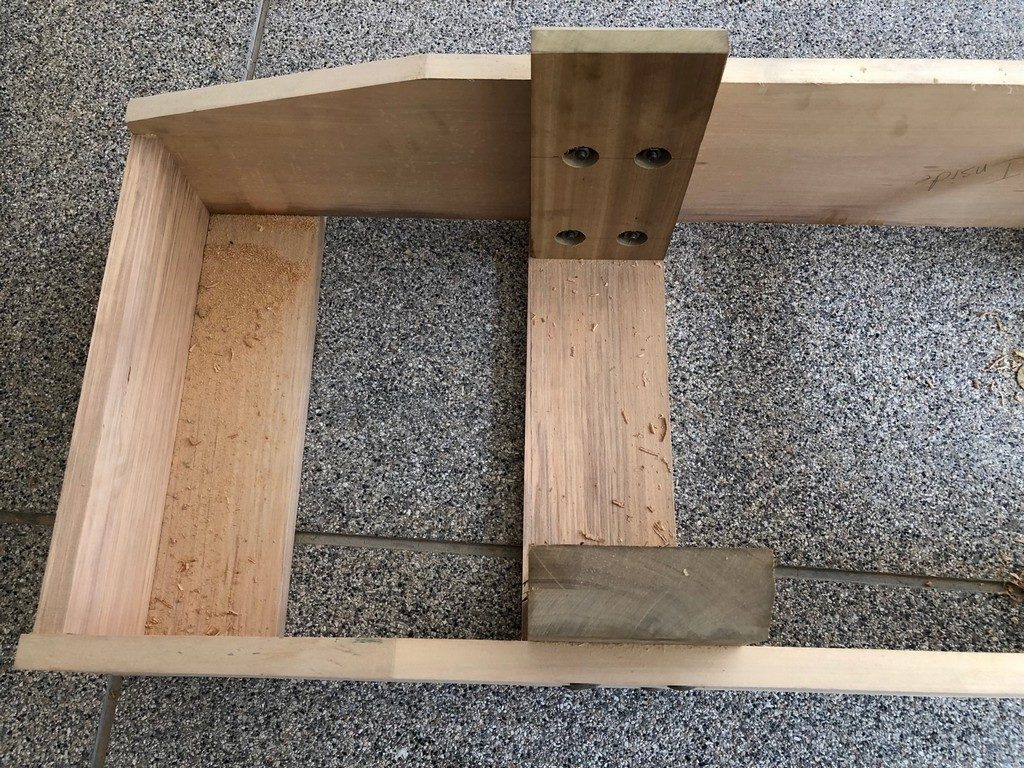
Joinery on the bottom of the workbench is easy to see.
Springy flappy thingy
The spring-loaded flap in the back was straightforward. The only ‘trick’ is to buy a hinge that lays flat, as a normal door hinge will work but not look to great. Piano hinges are made with this ‘lay flat’ design, door hinges are not. We got lucky and found some cheap door hinges that had the ‘lay flat’ design. Hard to explain, take a look at the picture.
Tip: You will need to cut the flap to a custom length, as your tops and bottoms may not be exactly the same size as in the plan (unless you are a human-robot CNC machine). Do a dry fitting of the top and bottom and measure how high the tail is off the ground. Take about 1/4 inch off the measurement and that is how tall your flap needs to be.
A piano hinge is perfect, but harder to find. We used normal door hinges, but you need to find hinges that lay flat, if possible. See picture, below.
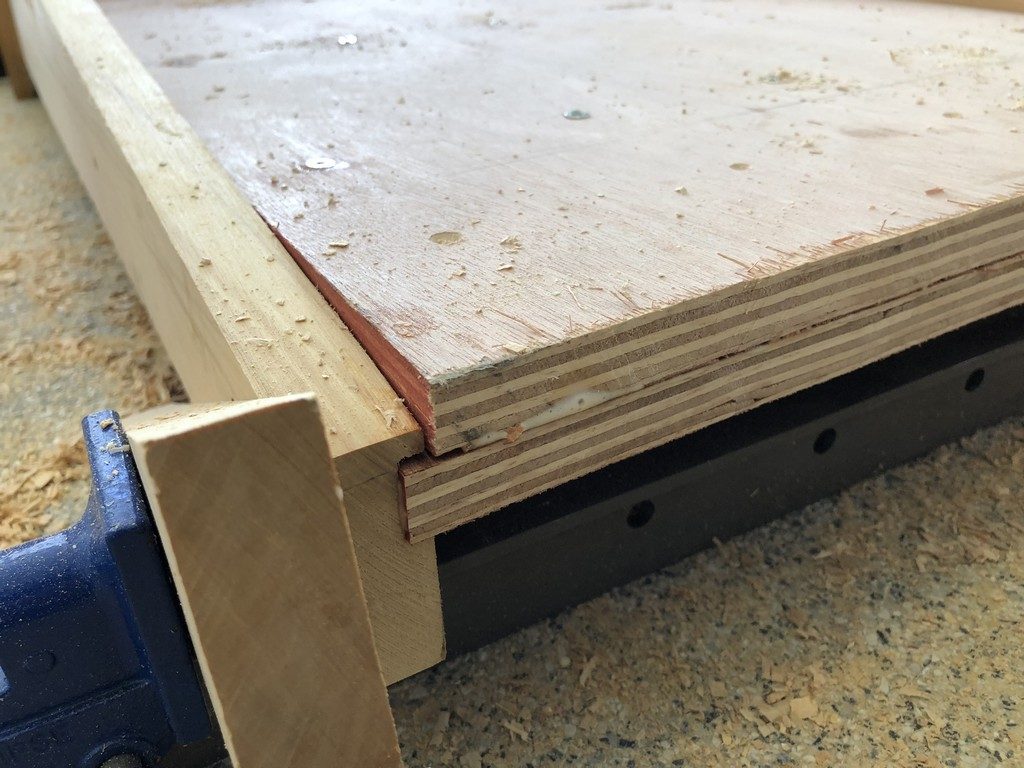
Because we used 2 layers of plywood, the leading edge of the ramp is a little sharp on the bottom edge, so we sanded a bevel in the plywood. Pictures are worth 1000 words, see below.
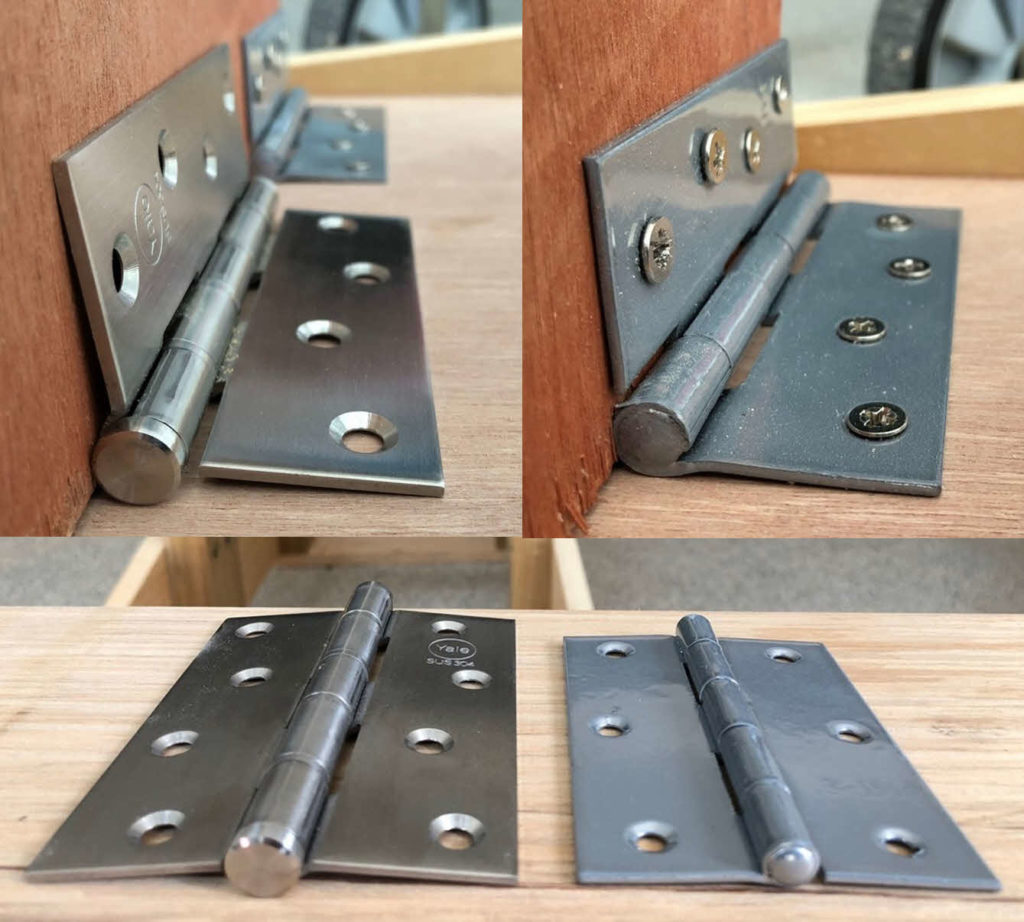
Need to find flat hinges. Cheap was better than Yale!
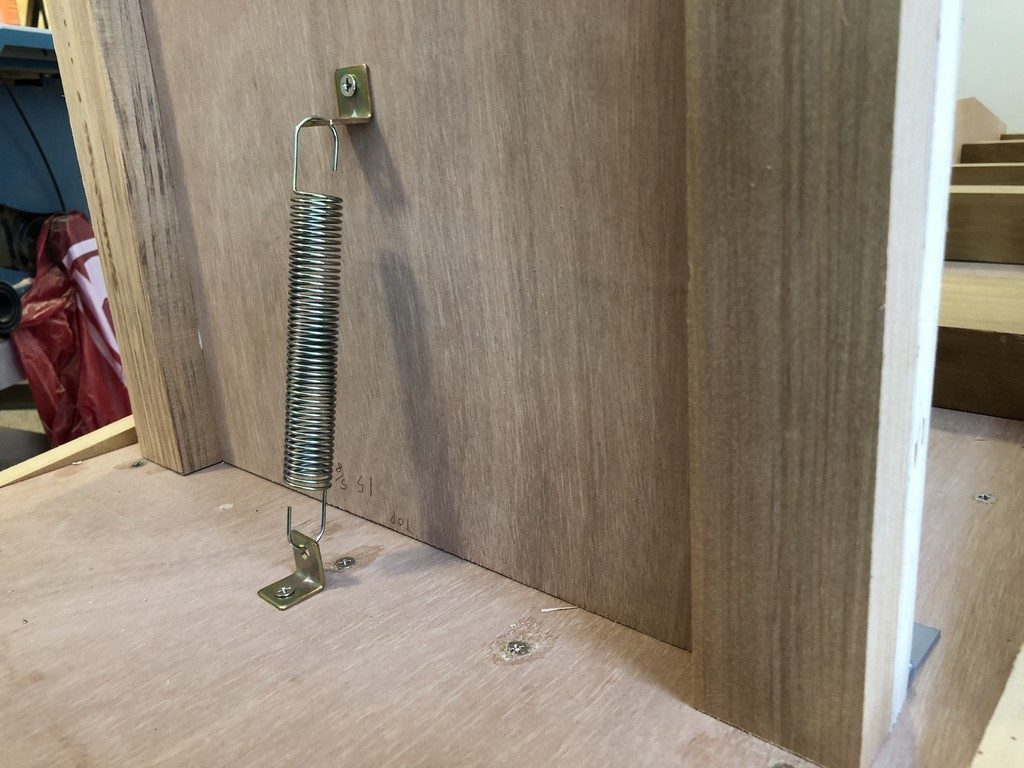
Simple corner bracket and hinge. We did way too much thinking on this one!
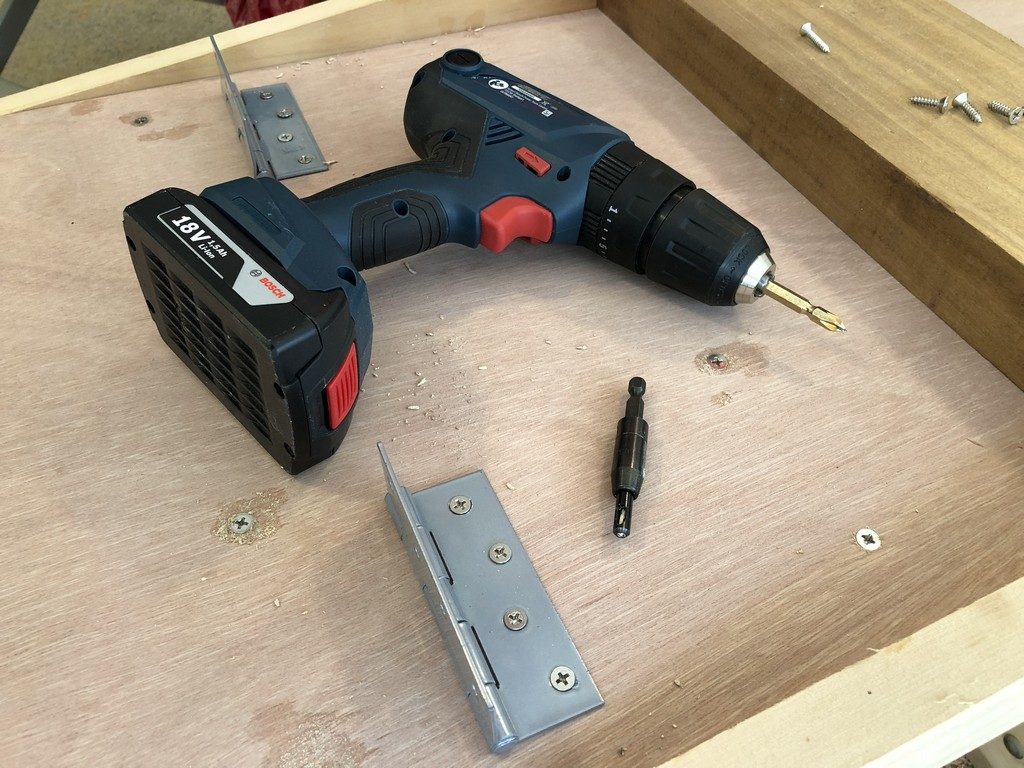
Special tool for centring drill bit in hinges. Awesome.
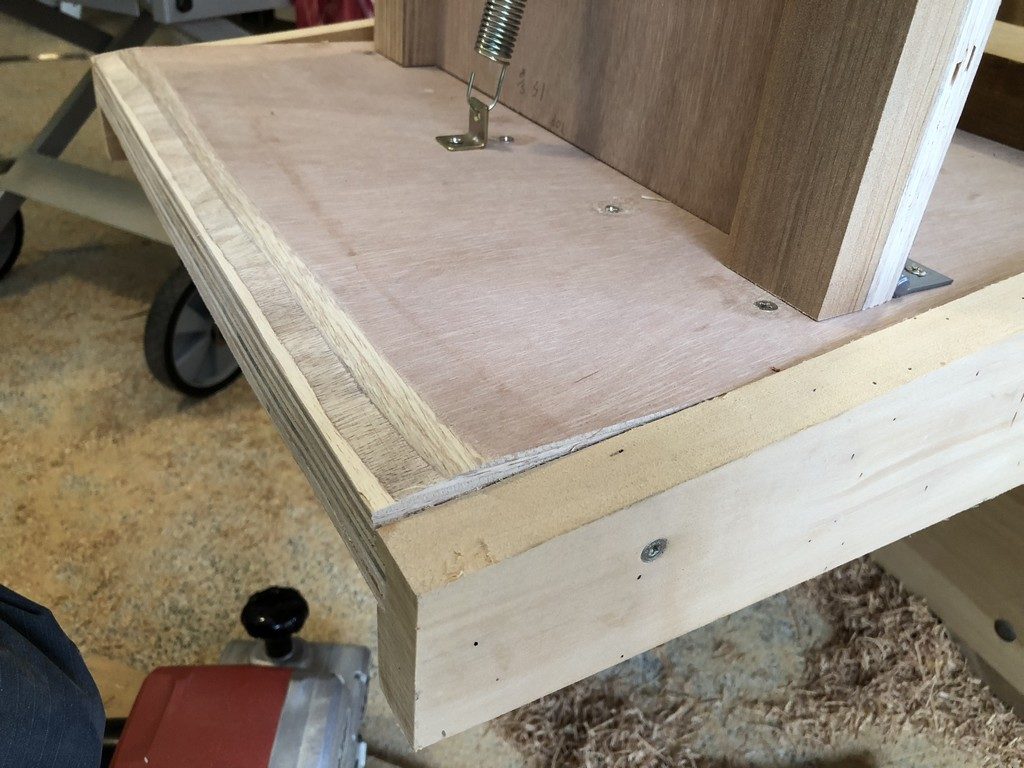
The extra 3/4″ plywood brutally bevelled with a belt sander.
Drill baby, drill!
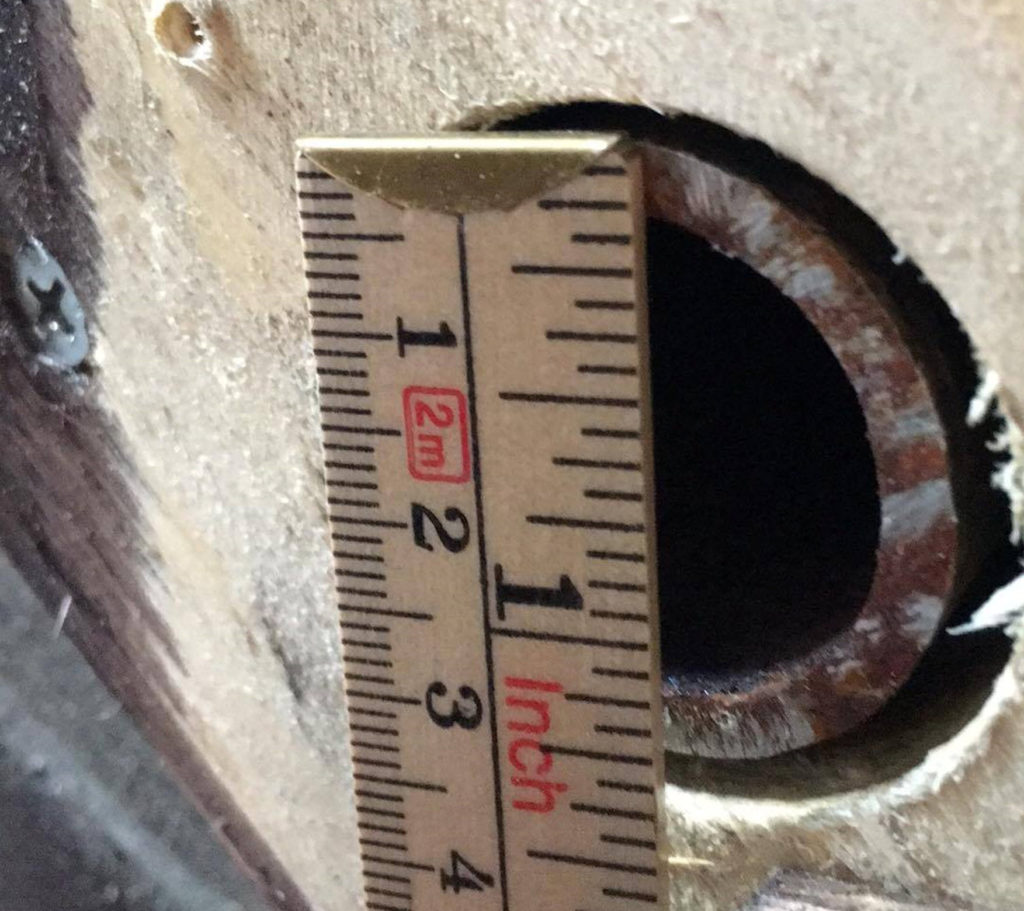
The big scary moment is now with us. We need to drill the hole for the pivot! Point of no return. We mess this up, we wasted a lot of wood and time. We grab a coffee and ponder our next move.
We made a hole that is 1 1/2 inches in diameter. We used a 1-inch plumber pipe that has an OD of about 1 1/4 inch. This leaves us with 1/4 play and this is VERY IMPORTANT. It is good to have a little play as the top and the bottom need to move freely, and since we are not human-CNC-robots, this little bit of play allows things to move smoothly.
It was simple. Just put the top and bottom together. Make sure you have the top and bottom lined up the way you want them to be. Mark where you are going to drill the hole. To mark where you are going to drill on the other side we measured the distance from the back to where we marked the hole for side 1, then we used that same distance on side 2. This ensured the holes would be aligned.
Take your hole saw and drill. Drill another hole. Put a metal pipe in the hole and test it out.
Smile. You did it. Show your wife. She will look at you like you are crazy. That makes it all worthwhile.
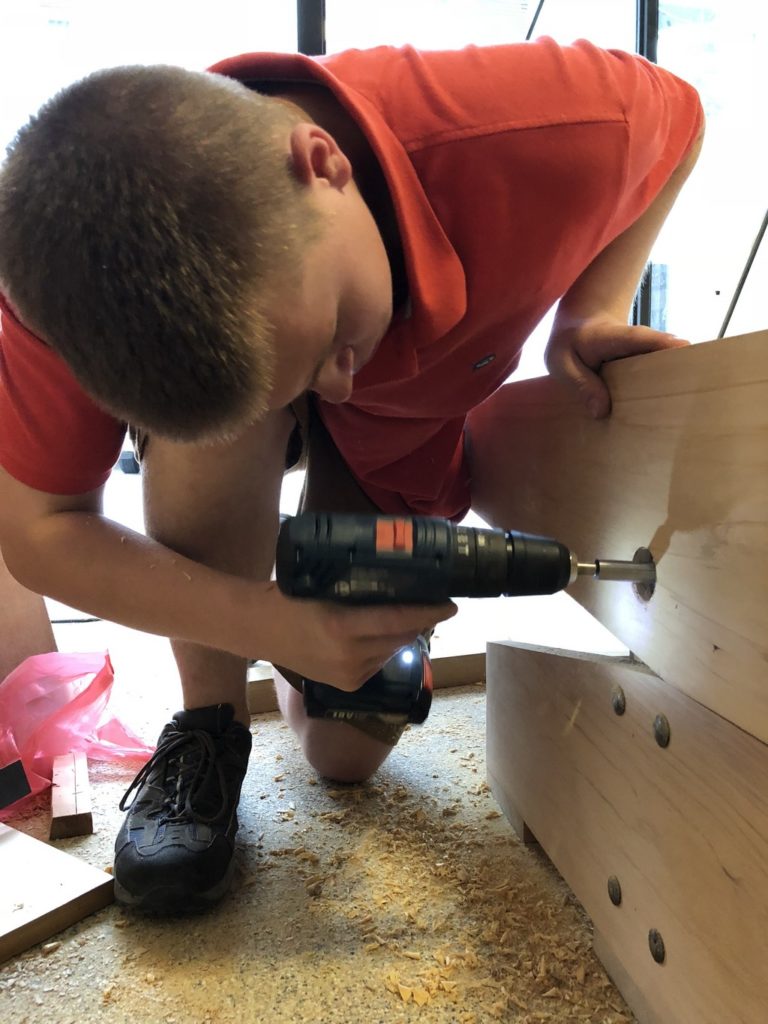
Drilling the 1.5 inch hole for the pivot.
Big pipe
The pivot pipe is pretty simple. We used 1 inch galvanised plumbers pipe with an OD of 1.25. We drilled our hole 1 1/2 inches, so there is a little tolerance, and that is needed for this workbench to pivot. Do not try to make some perfect fit, as it will most likely bind.
We probably worried too much about how that pipe is going to stay in there, but we ‘think too much’. We used it a lot and the pipe just magically stays in there. But, if you want to really make sure, we did 2 versions. One way is to drill some holes in the pipe and put a cotter pin in the hole, and this is trapped between the legs so it will never move. Or, we did a fancier way and made a brass plate with our name on it and trapped the pipe inside with workbench. In Thailand, a custom CNC job like this cost less than US$35 for a pair of brass plates 1/2 thick. We went fancy.
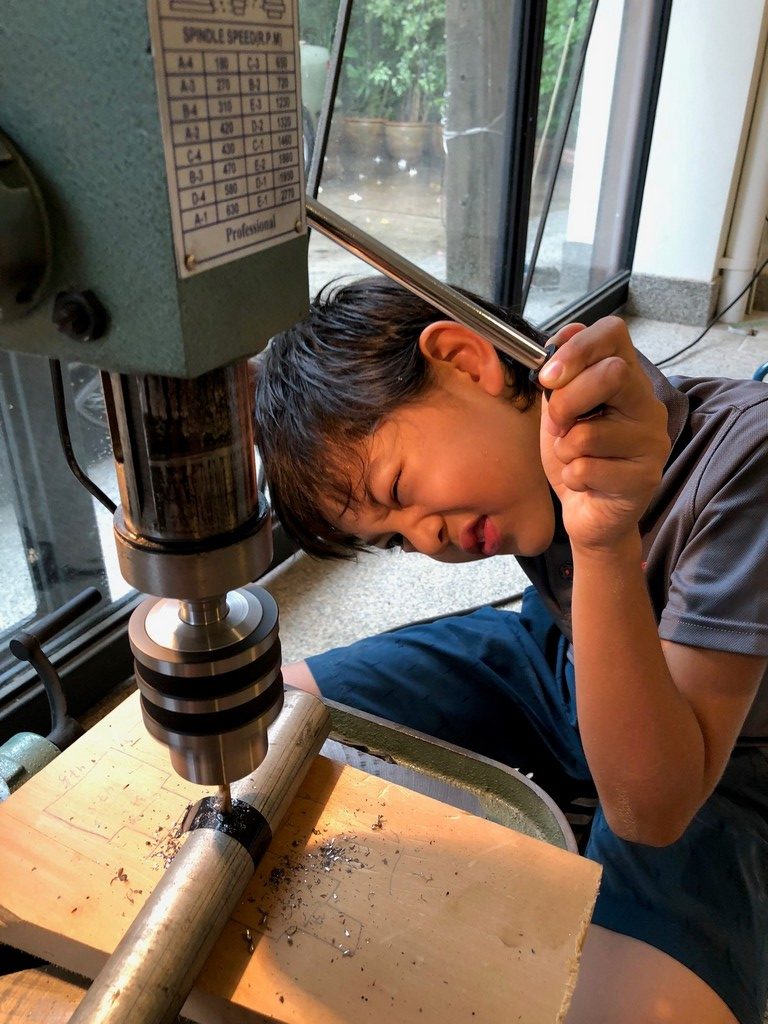
Eagle eye from little helper.
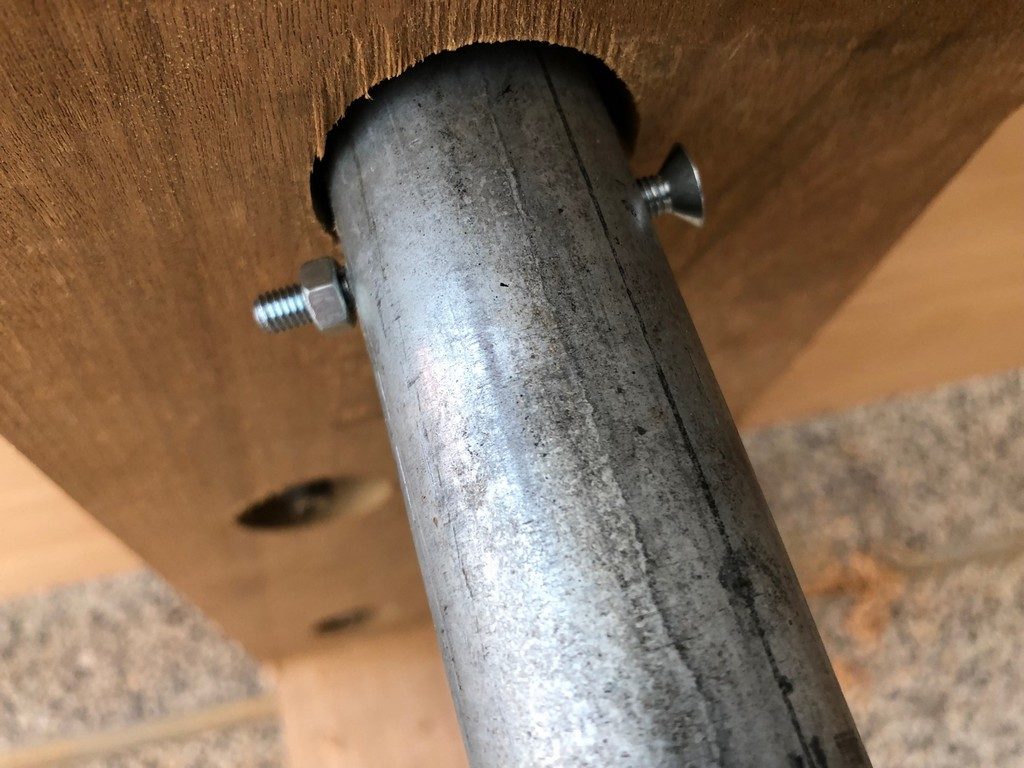
One way to keep the pipe from sliding around – details matter.
Slip sliding away.
<INSERT PICTURE OF BRASS PLATE>
David’s big idea…
David and I talked many times about the need for some tie downs to make sure a bike does not tip over. We had such a pretty workbench we did not want to ruin the sides with some ugly solution. When we were in Global (a Thailand hardware megastore), we saw monster size cable clamps and David had the idea to use them as the tie down clamps, with the added bonus is they nearly disappear when not in use. David goes to RIT (Rochester Institute of Technology) in the Fall of 2018, they will get a good guy.
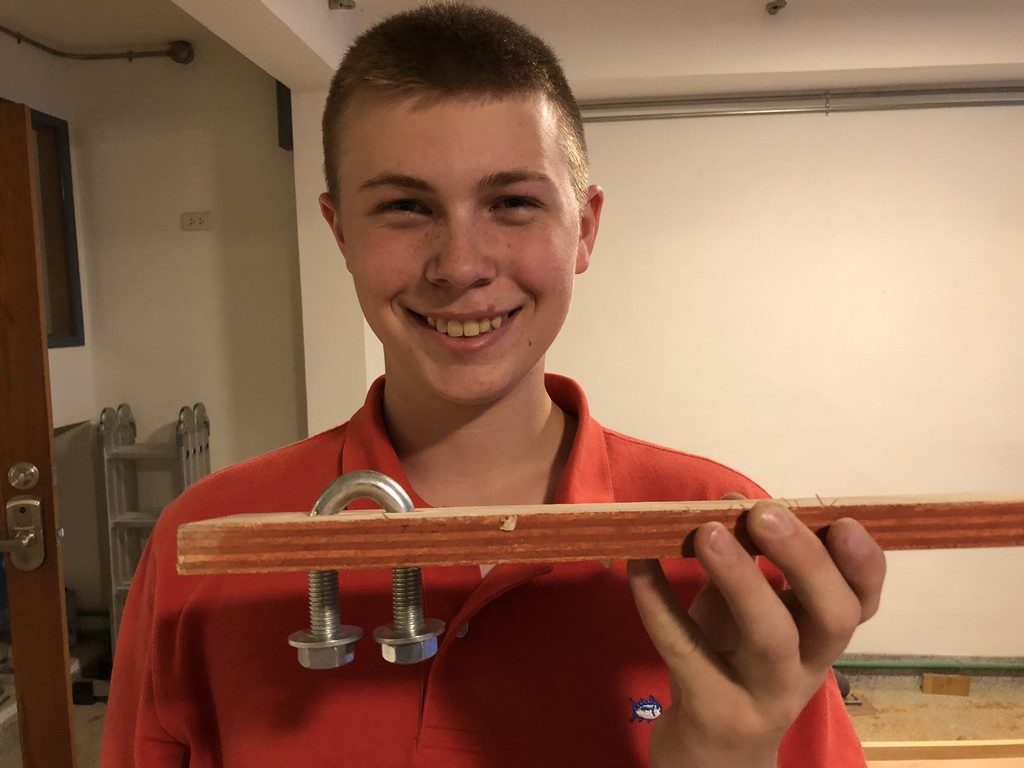
David’s tie-down invention (recessed mode).
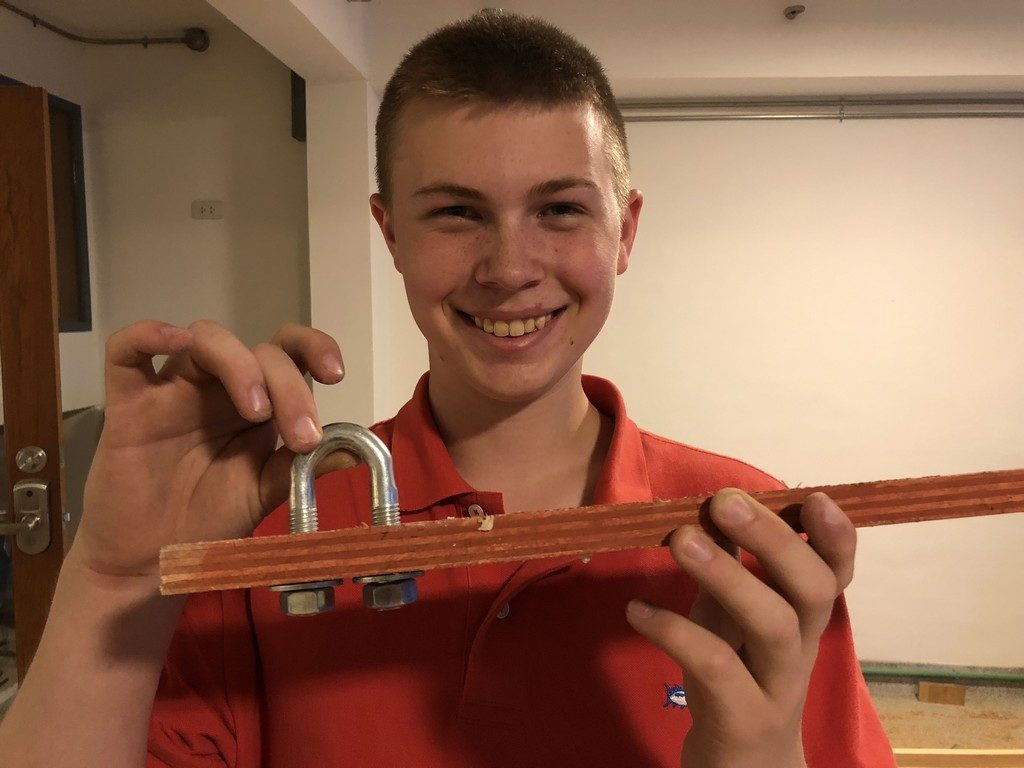
David’s tie-down invention (in-use mode).
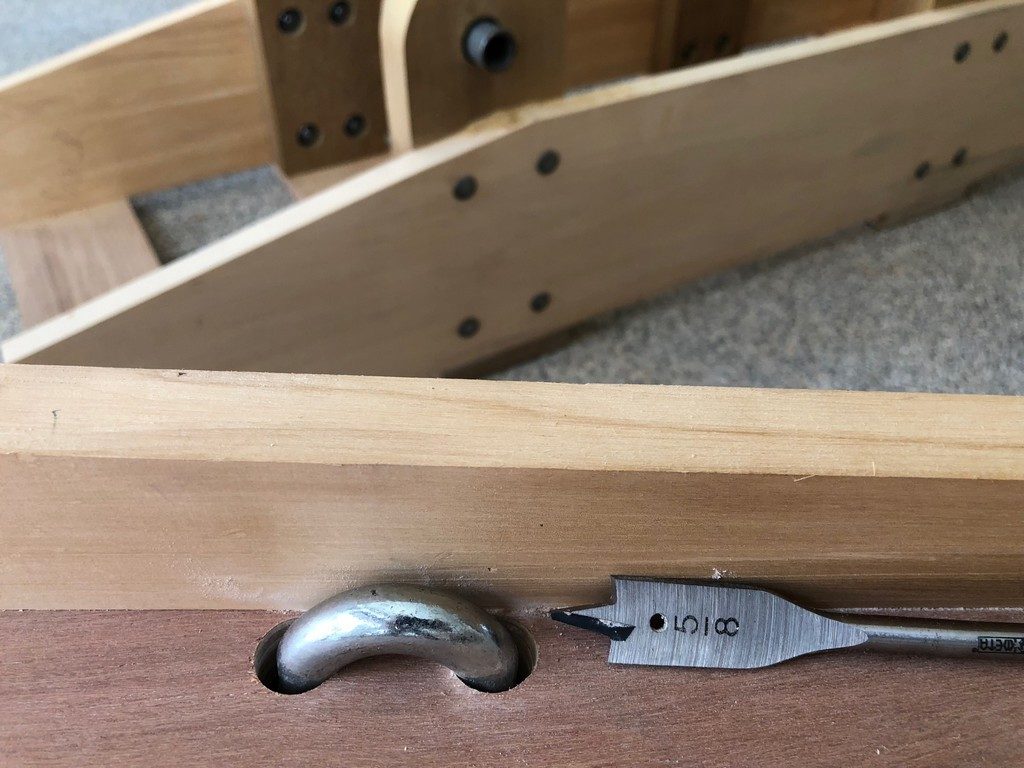
U-bolt for the tie down.
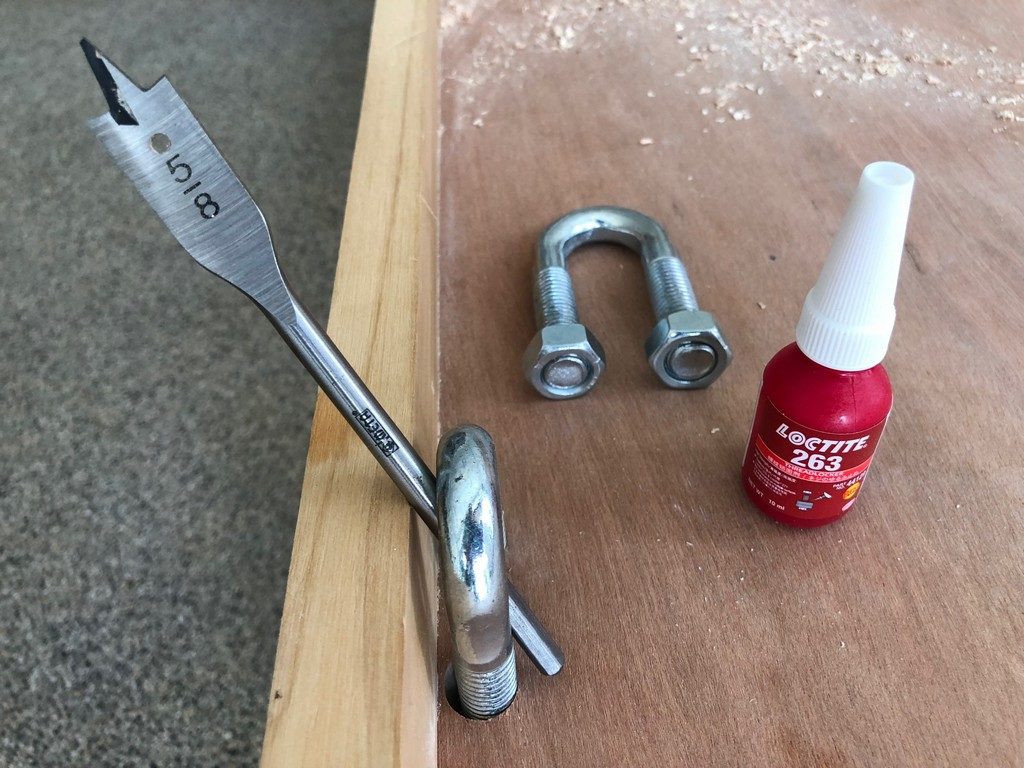
U-bolt only has a little clearance on the side. I like it. I left off the washers.
Finishing up.
There are a few small items left.
- Cutting the 1-inch plumbers pipe is simple. We would cut it a little short so it does not poke out and scratch you.
- To keep the pipe in place, you have 2 main options. 1) put something over the hole so the pipe is trapped inside 2) drill a hole just inside the legs and put a coathanger cotter pin in the hole. For this to work, you need one on each side. We made a CAD rendered picture of how this cotter pin would look.
Mistakes? Never!
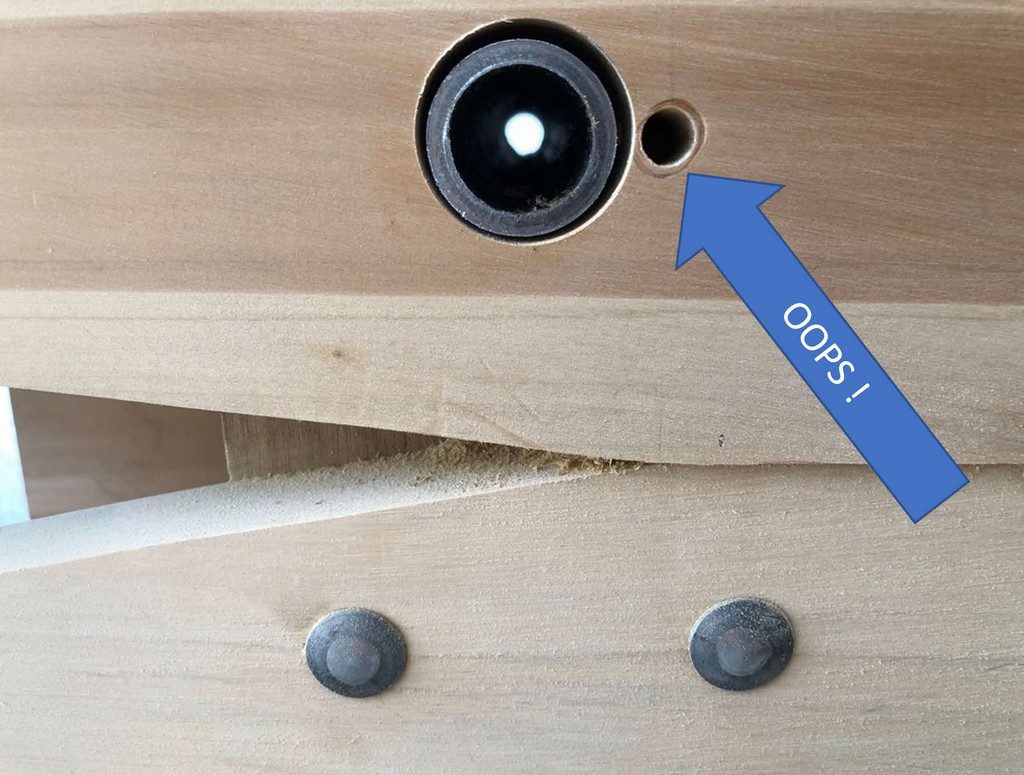
Drilled one of the pivot holes in the wrong place! That happened because we did not listen to our own advice 1) measure where to drill from exactly the same distance from the back (entrance area) of the workbench 2) measure twice and cut once.
We had a small misleading measurement on a drawing that confused us, so we cut a piece the wrong height. No big deal. Glad we made the workbecnh so we make sure the drawings work.
Ran out of the 1×6 for the feet, so on the 2nd workbench, we used 1×3. Works great, looks great.
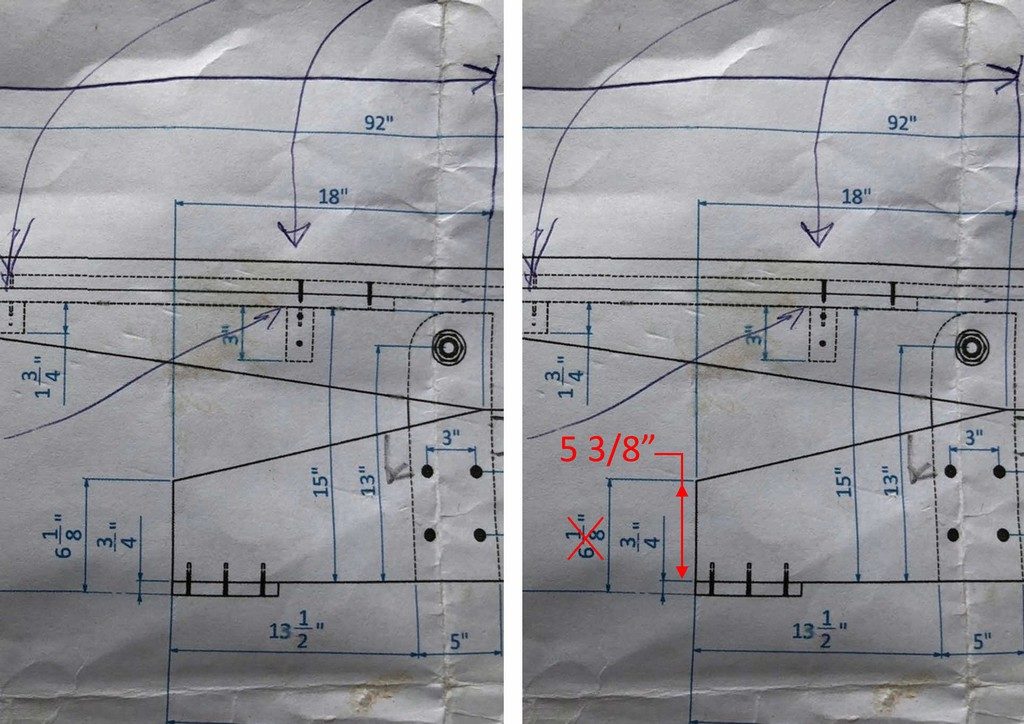
Misleading measurement made us make a mistake.
Measure twice, cut once!
How does it look?
The minute we finished we called one of our workmates outside and asked if we could test with his bike, a mighty Honda 125! In Thailand, we have small bikes.
How does it look?
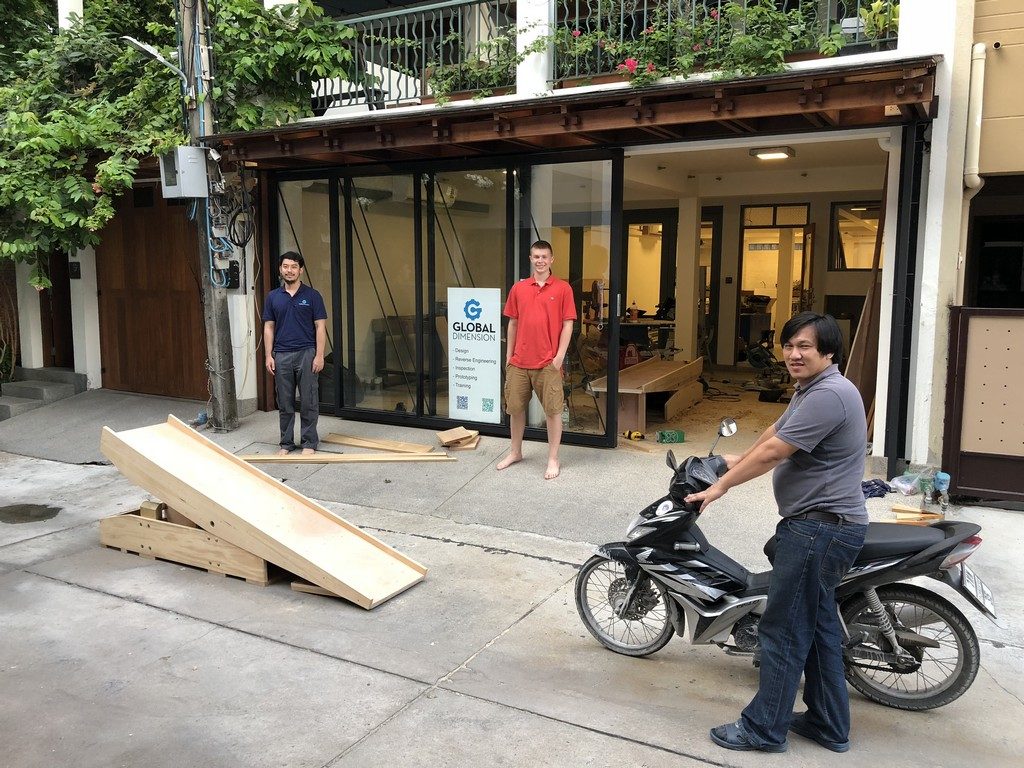
1-2-3 let’s give it a try!
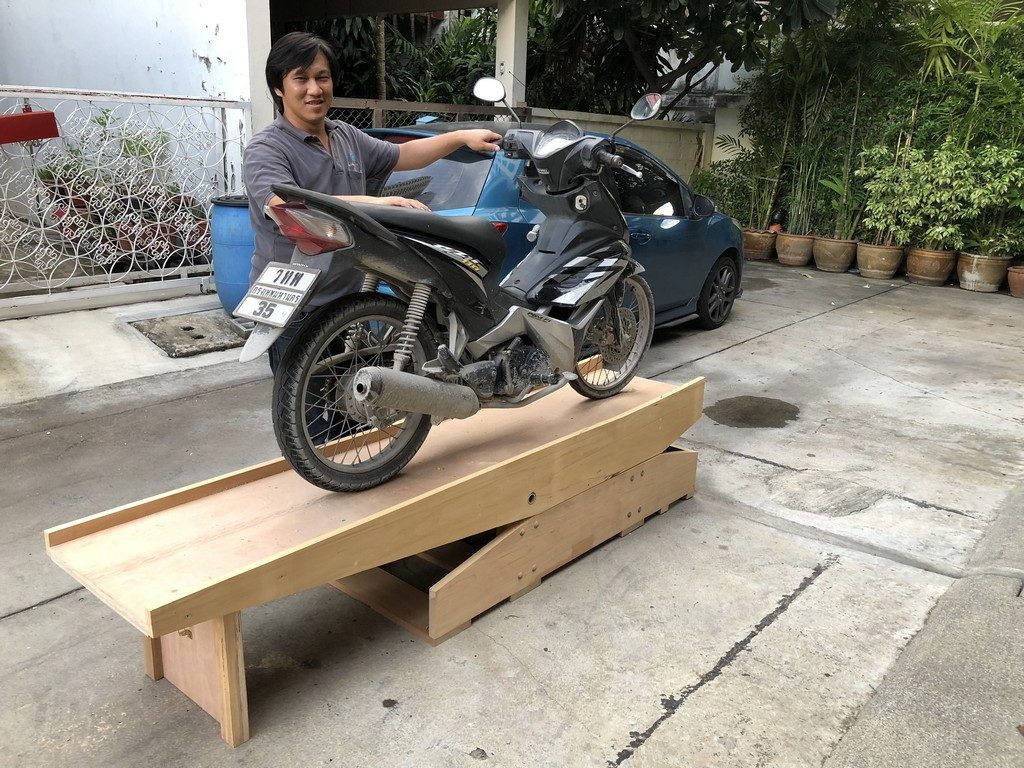
Proudly showing off the muddiest bike in the block.
The first use of the workbench. Hoorah!
3D renderings
Well, here you go!
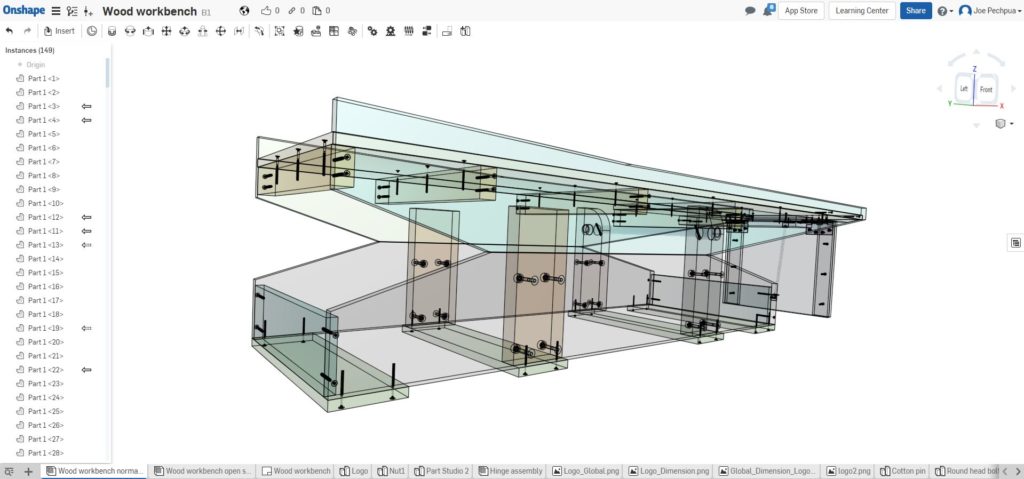
3D transparent view from Onshape!
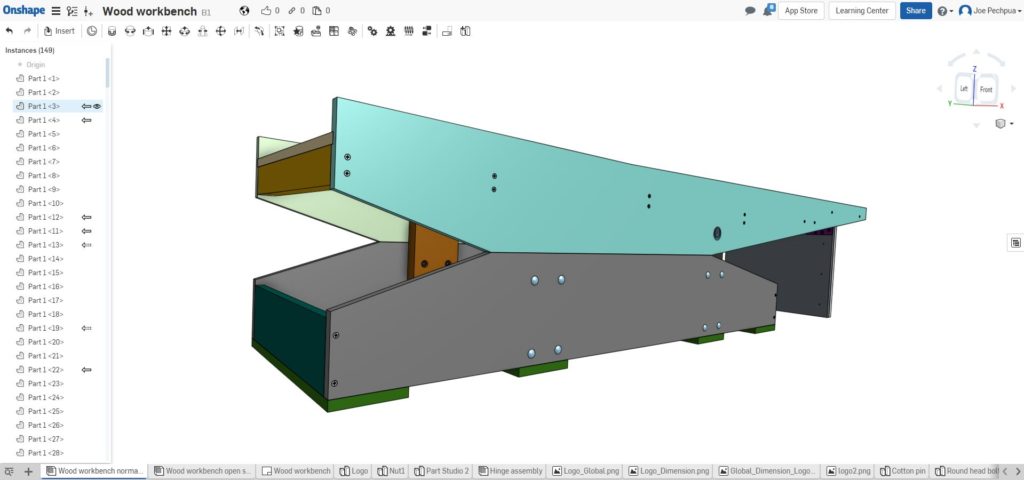
3D solid view from Onshape!
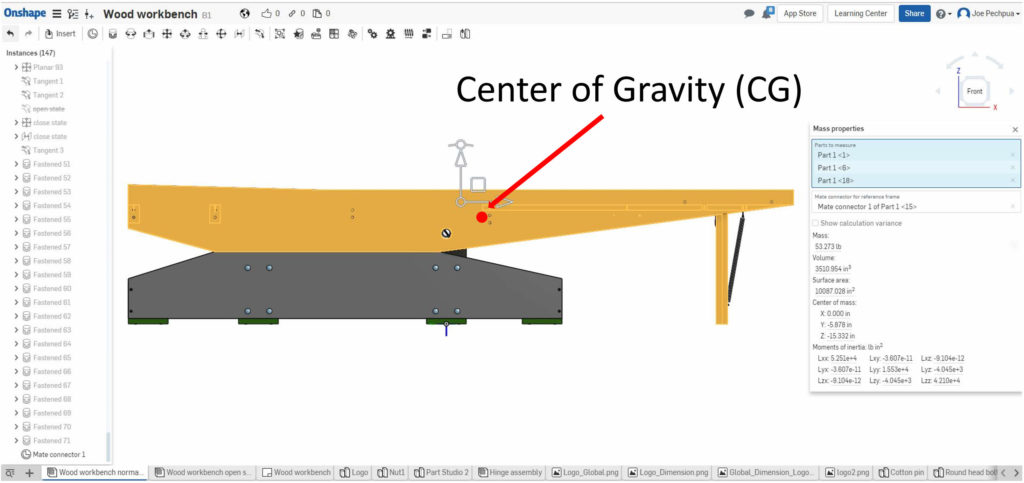
Onshape computes the Center of Gravity (CG).
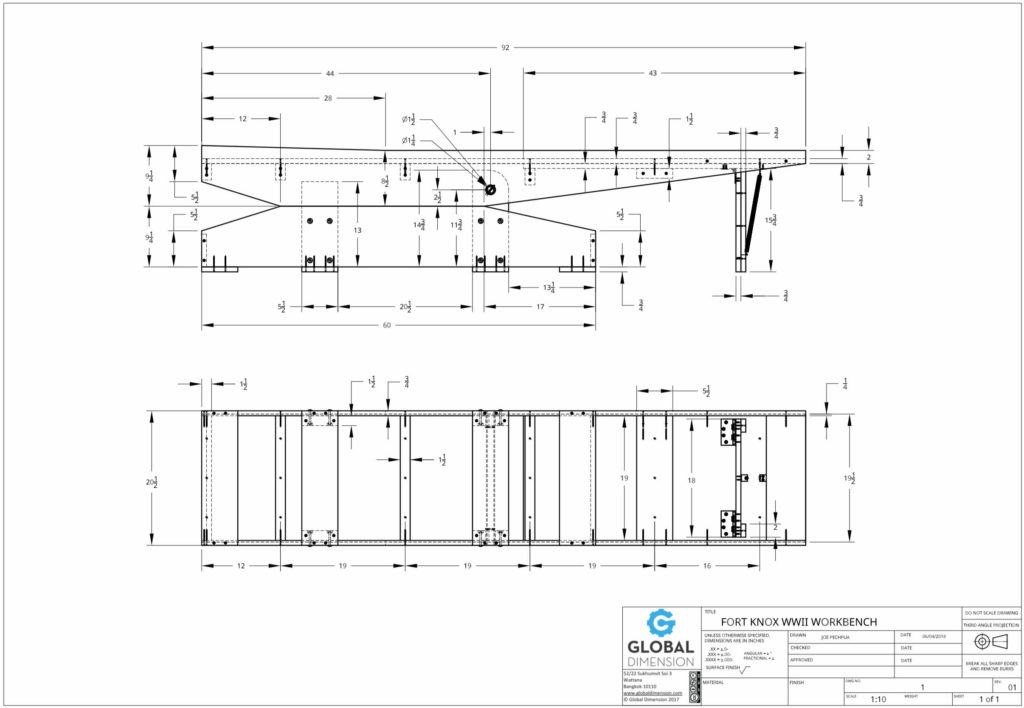
2D drawings
Of course, we made 2D drawings as well. We are providing the same 2 views that were in the original WWII manual but substantially updated.
If you want a high-resolution PDF copy of the drawings, please feel free to contact us, we will email it to you.
We had a dilemma about the wood sizes to use in the drawings. Out here in Thailand, we have full-sized wood, and this means a 2×6 is really a 2×6! In America and other parts of the world, a 2×6 is really smaller and is 1 1/2 x 5 1/2. Solution: We provide the USA/Inch/ACTUAL wood measurements in the drawings. If you use bigger wood, scale accordingly.

Wood sizes are different around the world.
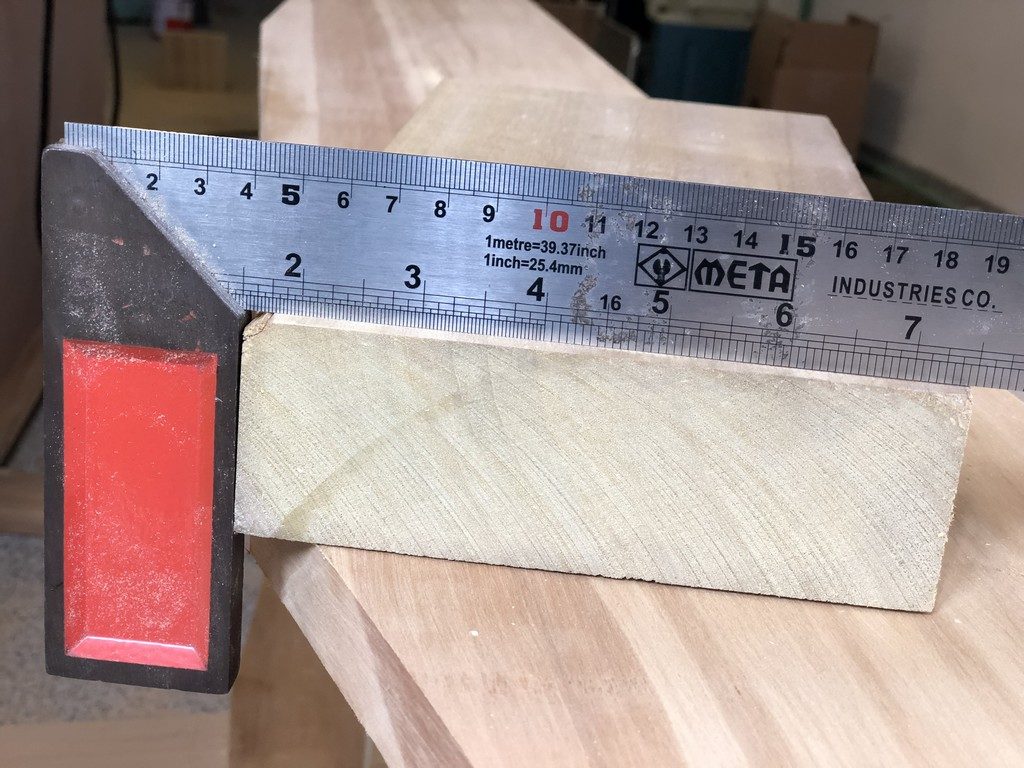
Thailand ‘manly wood’ is full size. This is a true 2×6, even after planing. Do you have ‘manly wood’ 😉 ?

Much better than what we started with!!
Wheel Chock
We think a wheel chock is really essential. We mounted ours at the very end, giving the bike the maximum amount of runway, so it can successfully get past the point of making the top drop to its horizontal position. We supplied some images of a Harley-Davidson 45 and a Harley-Davidson JD superimposed on the workbench, and their wheel placement matches exactly where this wheel chock is positioned.
Danne made his workbench a little longer at 97 inches, ours is 92 inches. He made it longer to create that longer runway. But if you watch Danne’s videos, you will notice his wheel chock is about 6-8 inches behind ours. We think by moving the wheel chock all the way to the end, we create the same effect as if we made it 97 inches long. You can make the entire workbench longer, but with the weight of the wheel chock and the added wood, the CG also moves forward and we calculate that only adding 3 inches will bring the CG to the tube pivot point. You may need to add 1-2 inches behind the pivot point to make sure the CG stays behind the pivot point.
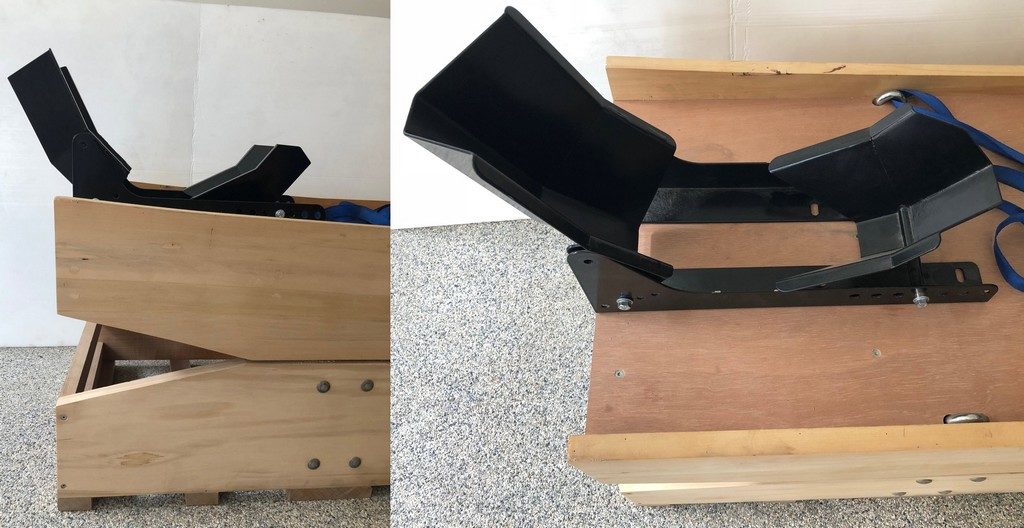
Wheel chock all the way to to the end.
Danne Modifications
Danne had some decent modifications. They are (3 items):
1: The is a metal rod with a black plastic cap that is inserted into the front half of the top platform that makes sure the stand will not accidentally tip up, and make the bike slide off the back. I think this is a ‘must’. We did the same modification with a simple carriage bolt.
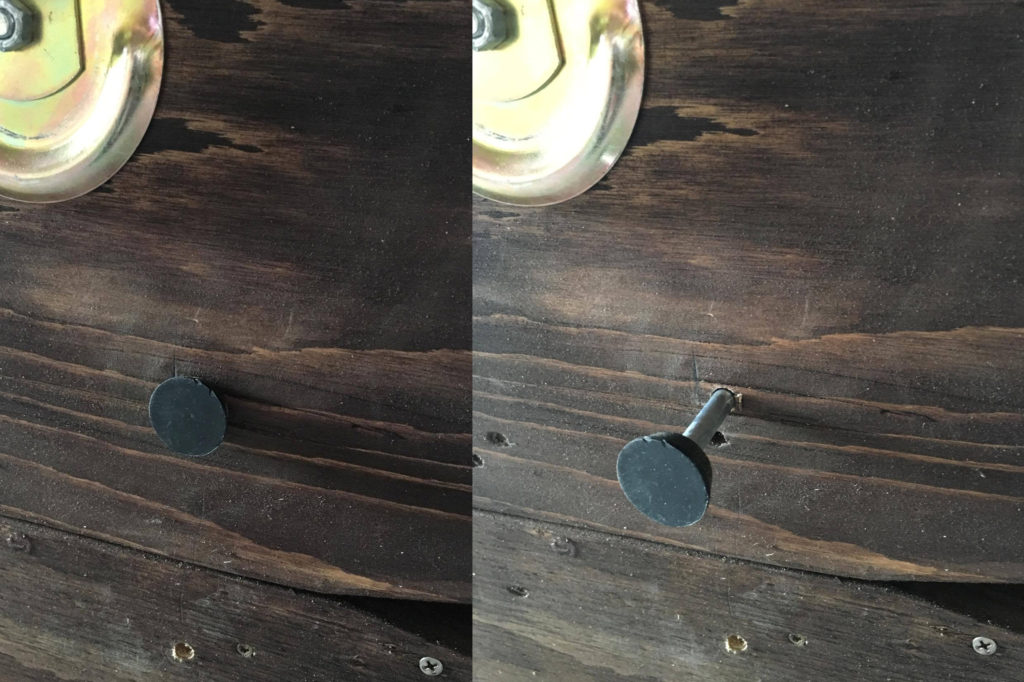
Danne’s safety stop metal rod and plastic cap
2. Danne added tie downs and handles. Pretty close to a ‘must’ and costs almost nothing. We also added tie downs.
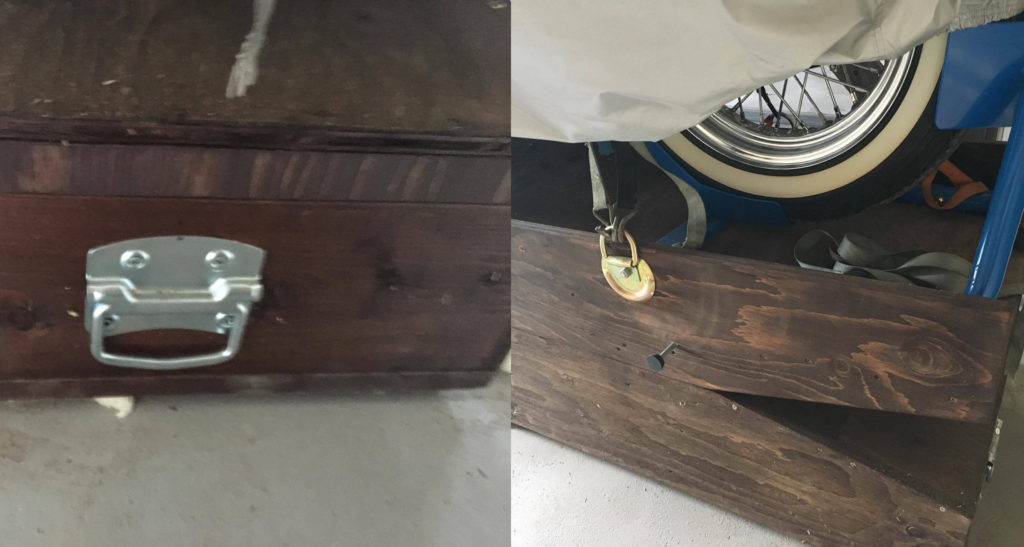
Tie downs and handle
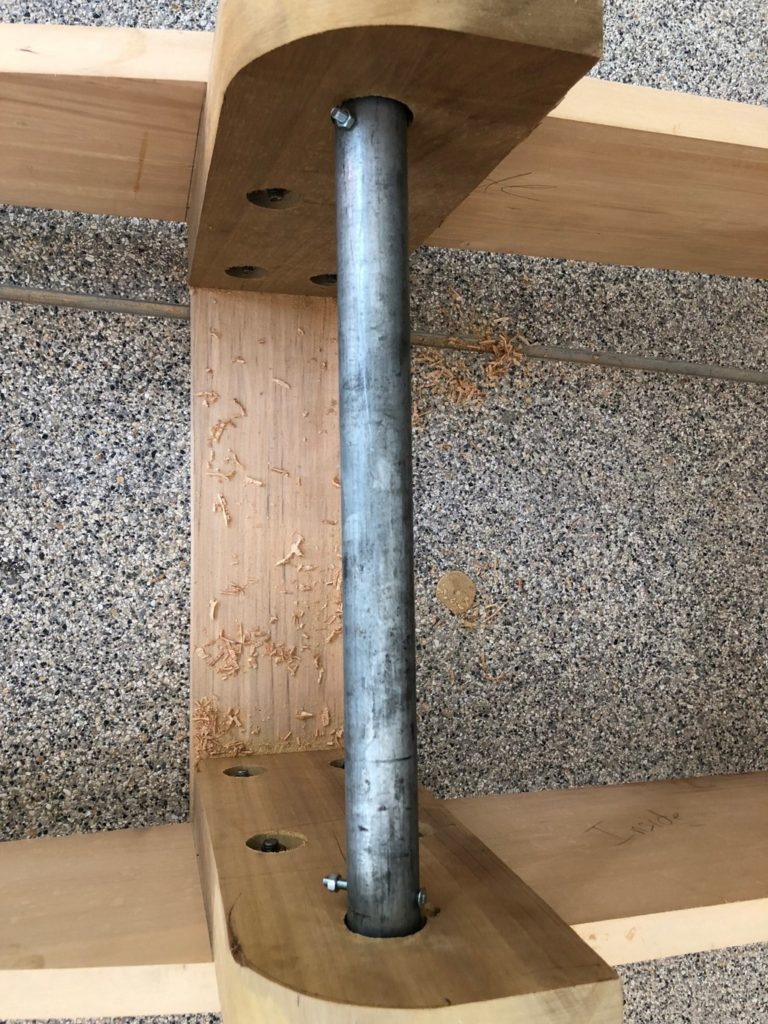
3: Large diameter galvanised pipe as the main pivot. Danne used a 1 inch (ID) plumber pipe with 1 1/4 OD. He wanted a large surface for the bearing surface, as it is the centre pivot and has a substantial load. We copied Danne as well.
Large diameter galvanized pipe for good load bearing surface.
Wrap up…
I know I would love to see other people making these workbenches. If anyone makes one, please send me finished photos and we will publish your accomplishments!
Now don’t forget, please share us on Facebook and anywhere else you may like. Please take the time to FOLLOW our Facebook page. Sign up for our newsletter!
If we can help you with any engineering/CAD/scanning, we will give a special price to anyone into old Volkswagens, old motorcycles, and other fun things. We feel your passion. We love what you do and will do our best to support you.
.
Our location is in Downtown Bangkok. Sukhumvit Soi 3, near Bumrungrad Hospital. The BTS is Nana or Ploenchit. We are easy to find at these friendly links:
Facebook: https://www.facebook.com/
Website: www.globaldimension.com/
Location: https://goo.gl/maps/
LINE: @global_dimension
Phone: +66 (0)2 253 2271
.
#3dprinting #3ddesign #3Dscanning #3Dscan#Reverseengineering #globaldimension #Solidworks#catia #3Dsystems #Geomagic #FaroARM#Creaform #cnc #cncowners #globaldimension3d#aermacchi #harleydavidson #motorcycle#vintagecar #vintageracing #classiccar #volkswagen#volkswagenbeetle #volkswagenbus #porsche